AI Action
Let AI follow your rules and handle asset organization and batch processing in one click.

 AI Action is a plugin for building AI-powered batch processing workflows for your images. You can have AI automatically rename images, write descriptions, add tags, sort into folders, and rate them, all in a single run.
This guide covers installation, setup, and running your first AI Action.
Before You Start: Install and Configure the AI Models
Why Do I Need the AI Models?
AI Action handles the workflow execution, but the actual image analysis is powered by AI models. The AI Models is Eagle’s unified model configuration center. Install it once, and all AI plugins share the same setup. You need to configure the AI Models before AI Action can work.
Install the AI Models
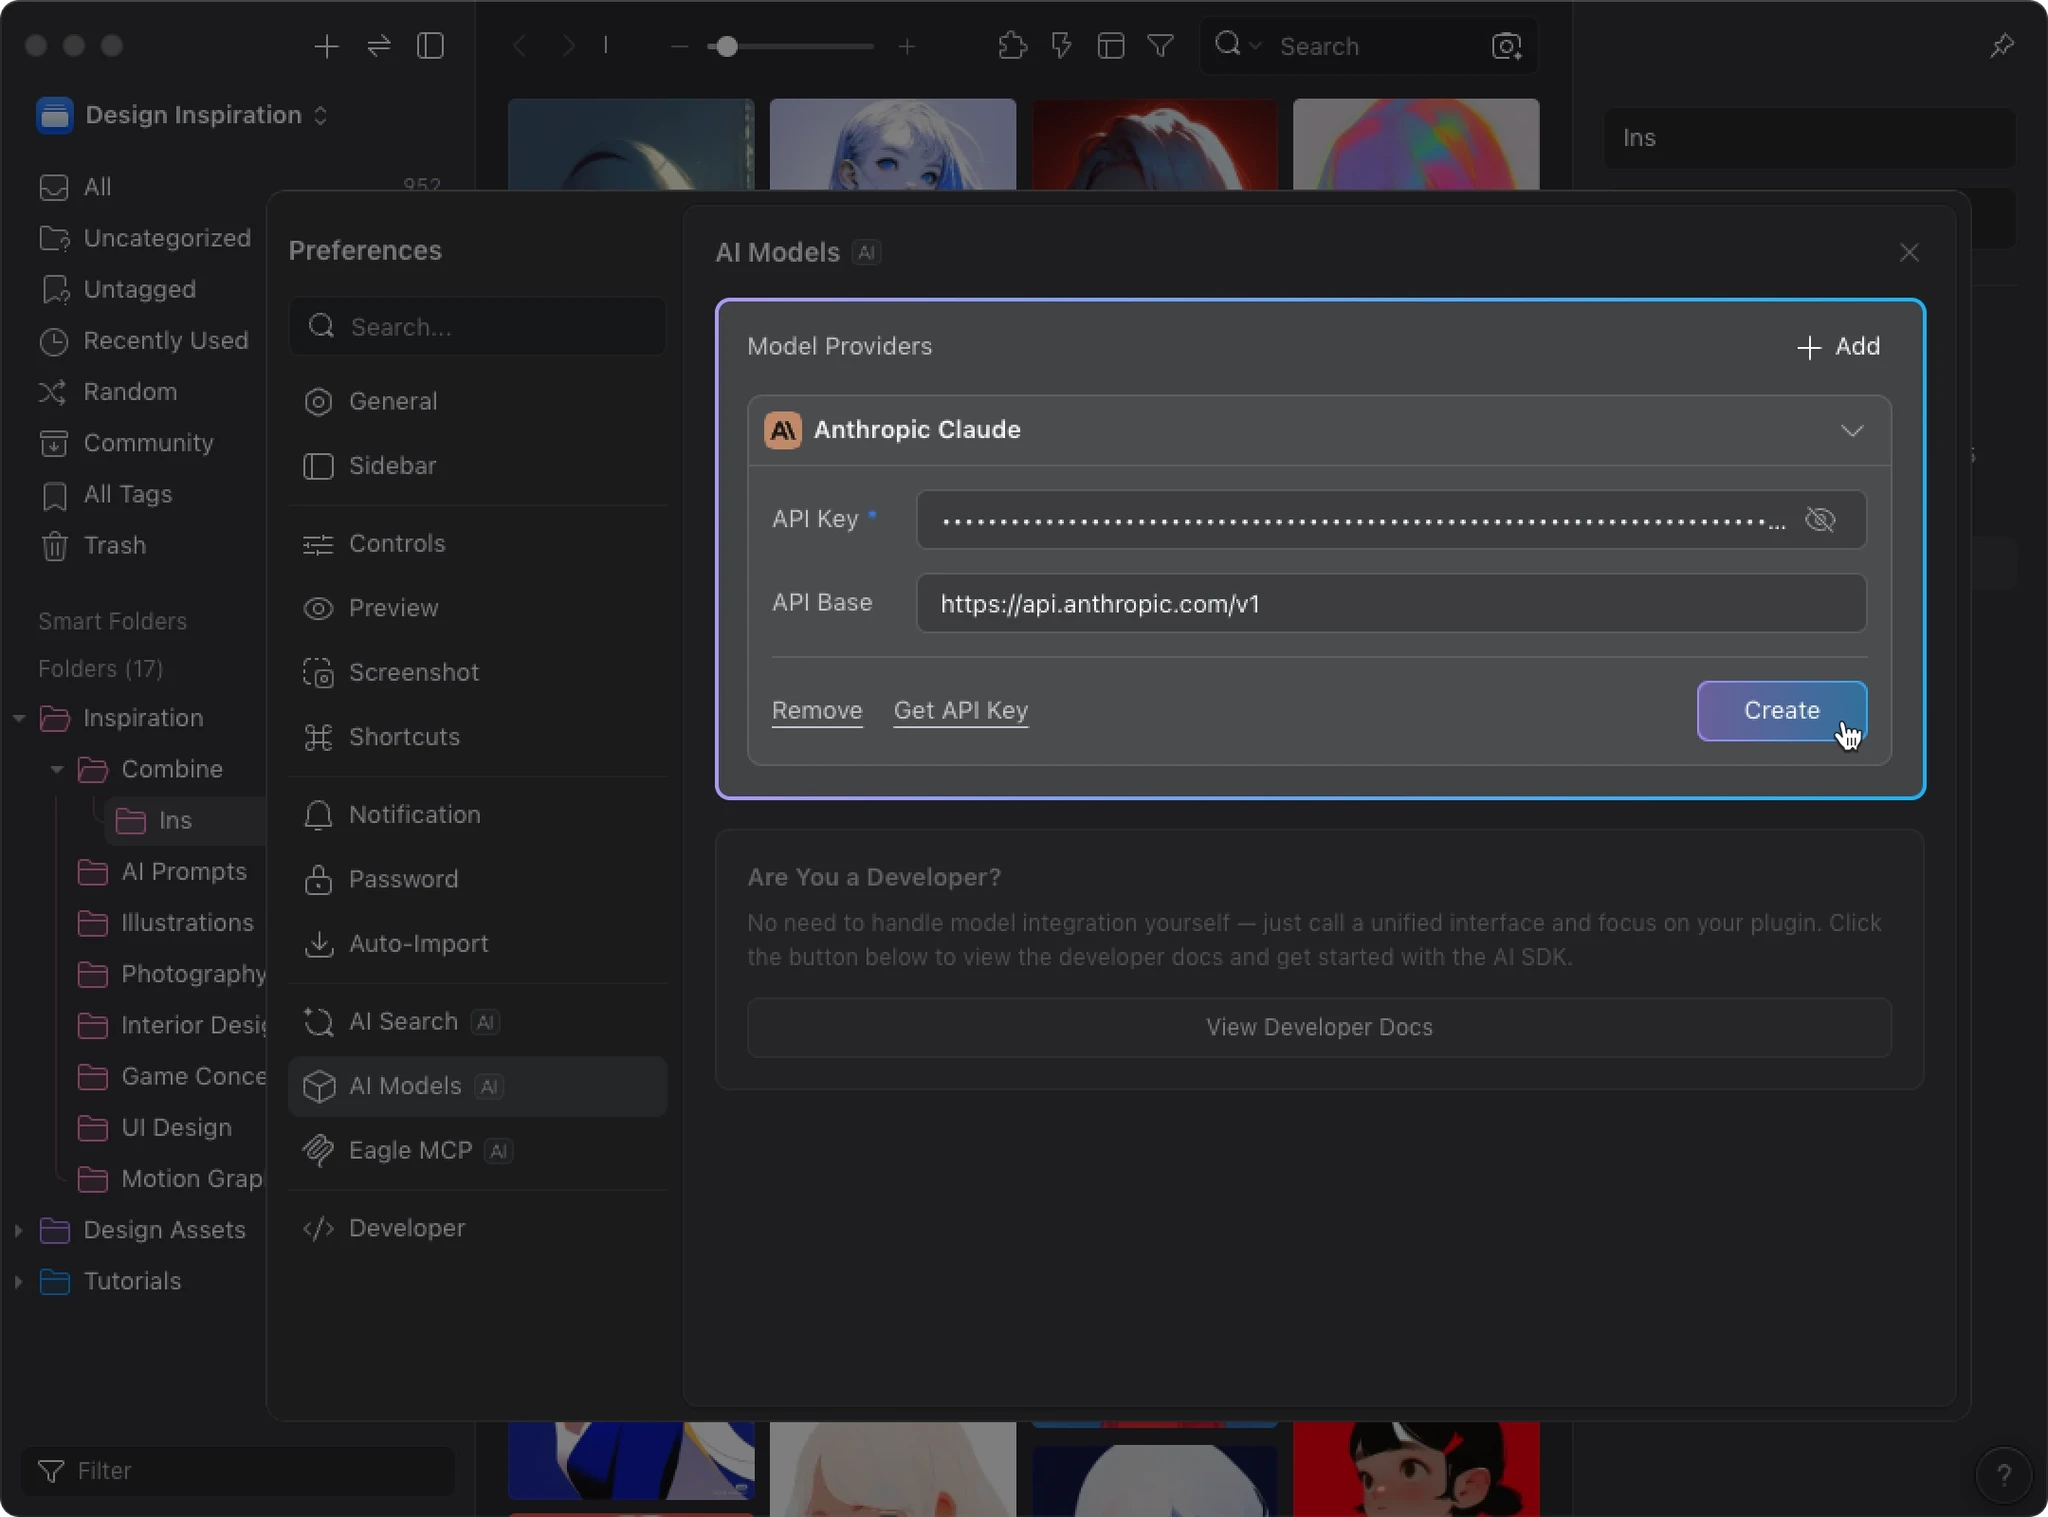
Open Eagle → “Plugins” → “Plugin Center” → search for “AI Models” → click Install.
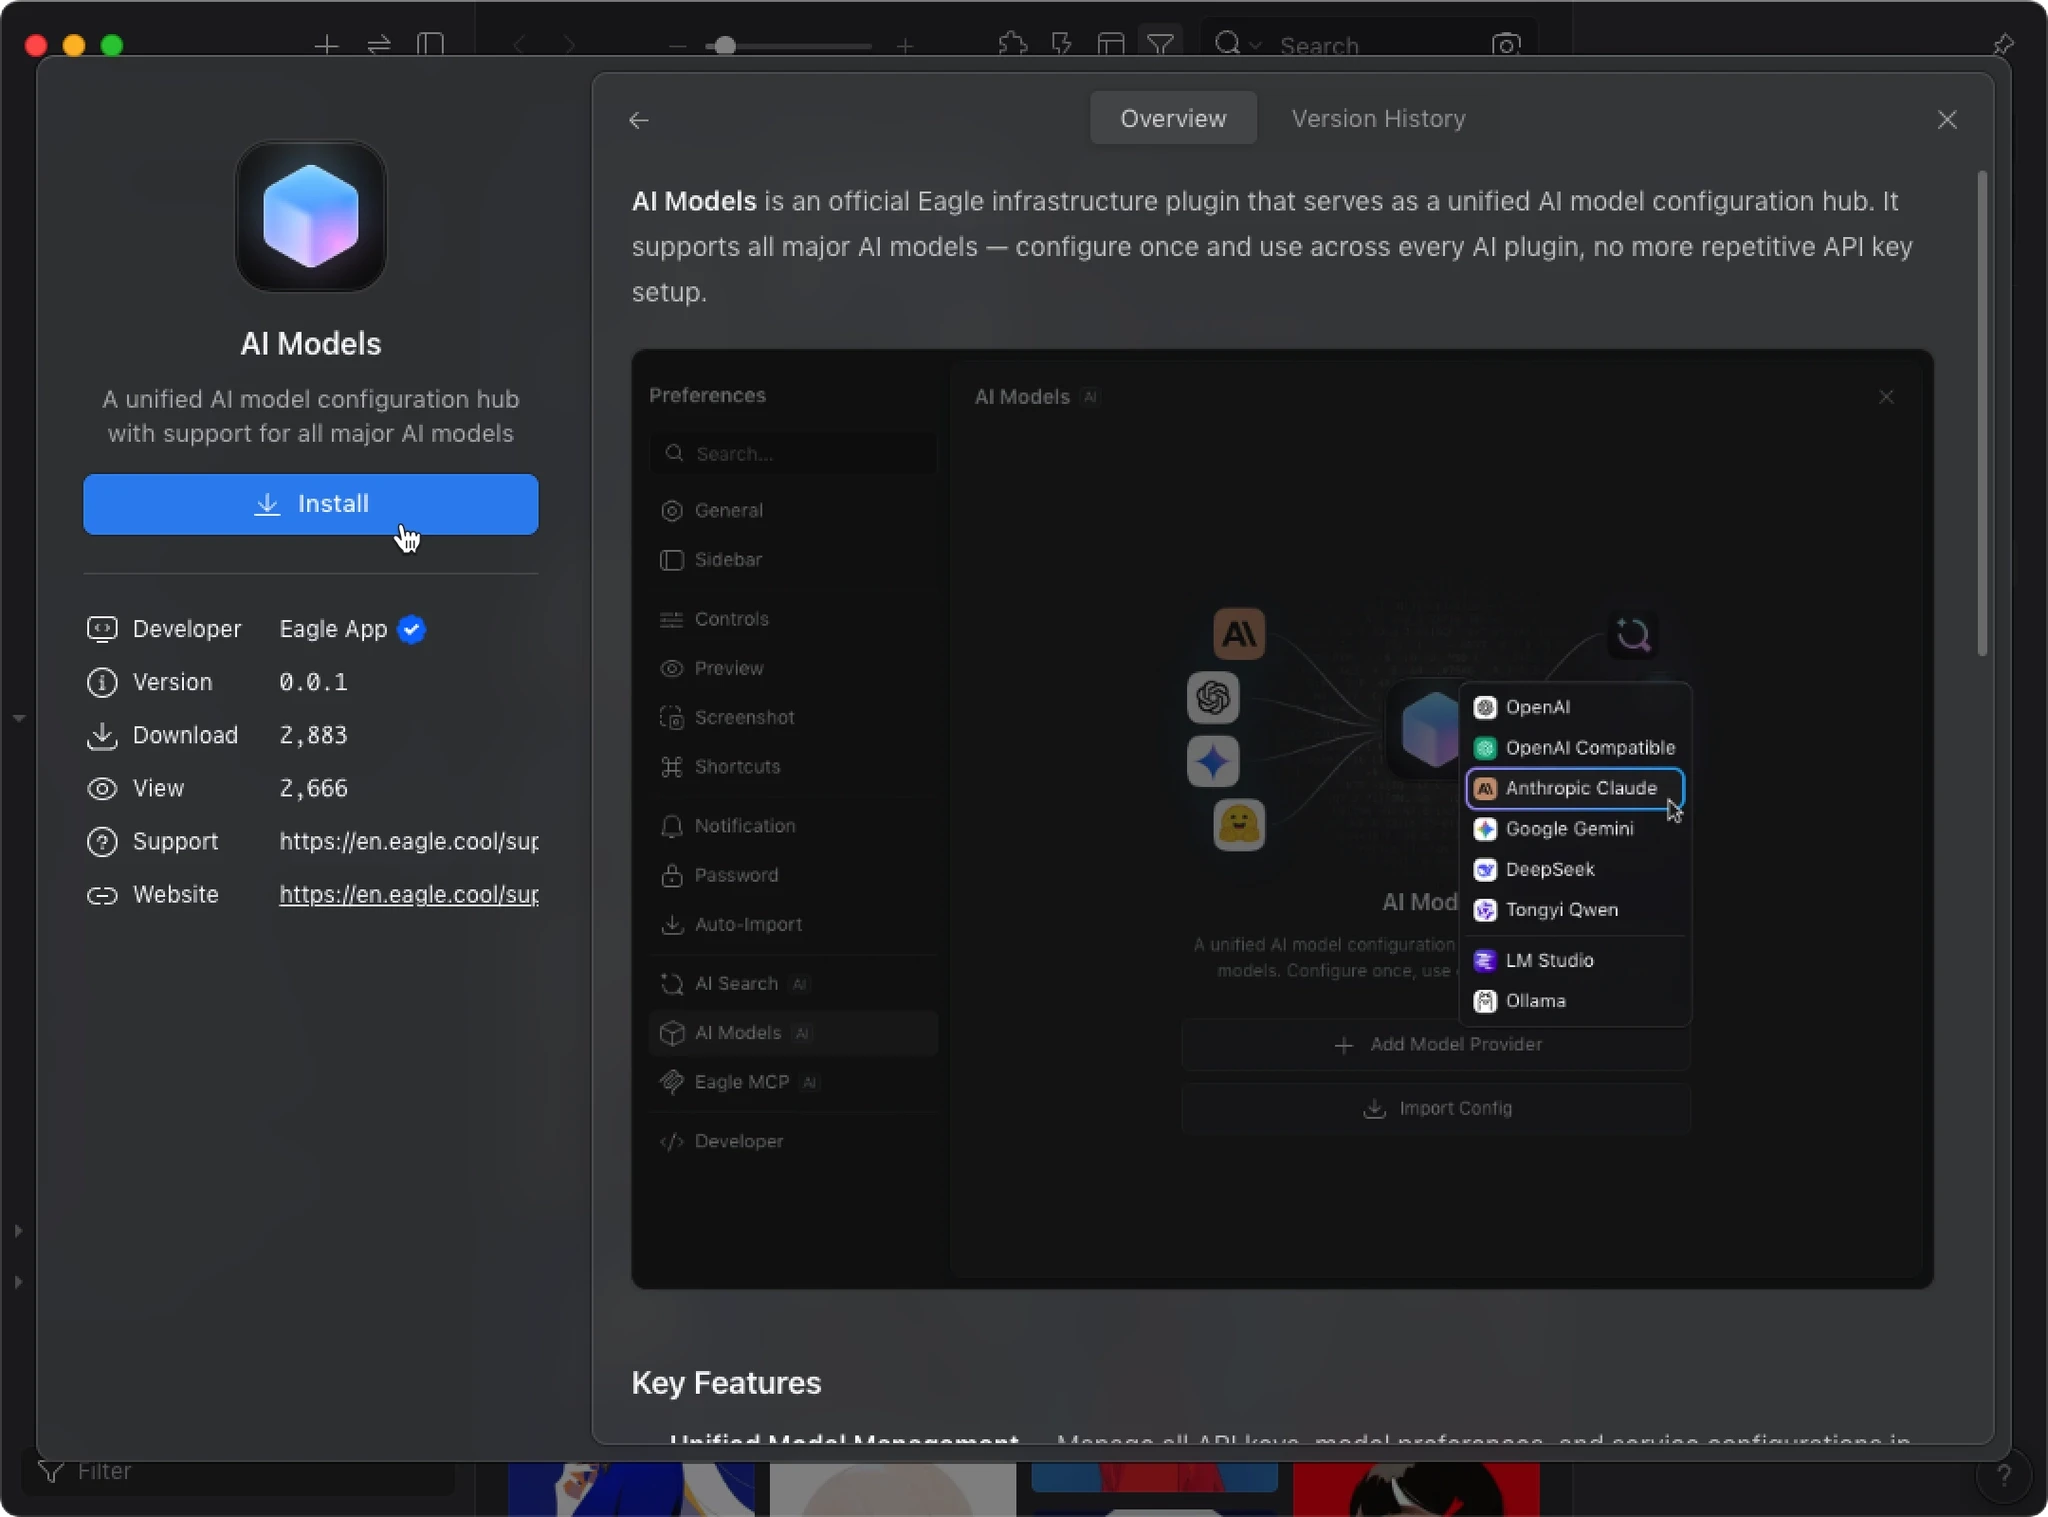
Configure an AI Model (Using Claude as an Example)
- After installation, open Eagle’s “Settings”
- Navigate to “AI Models” in the sidebar
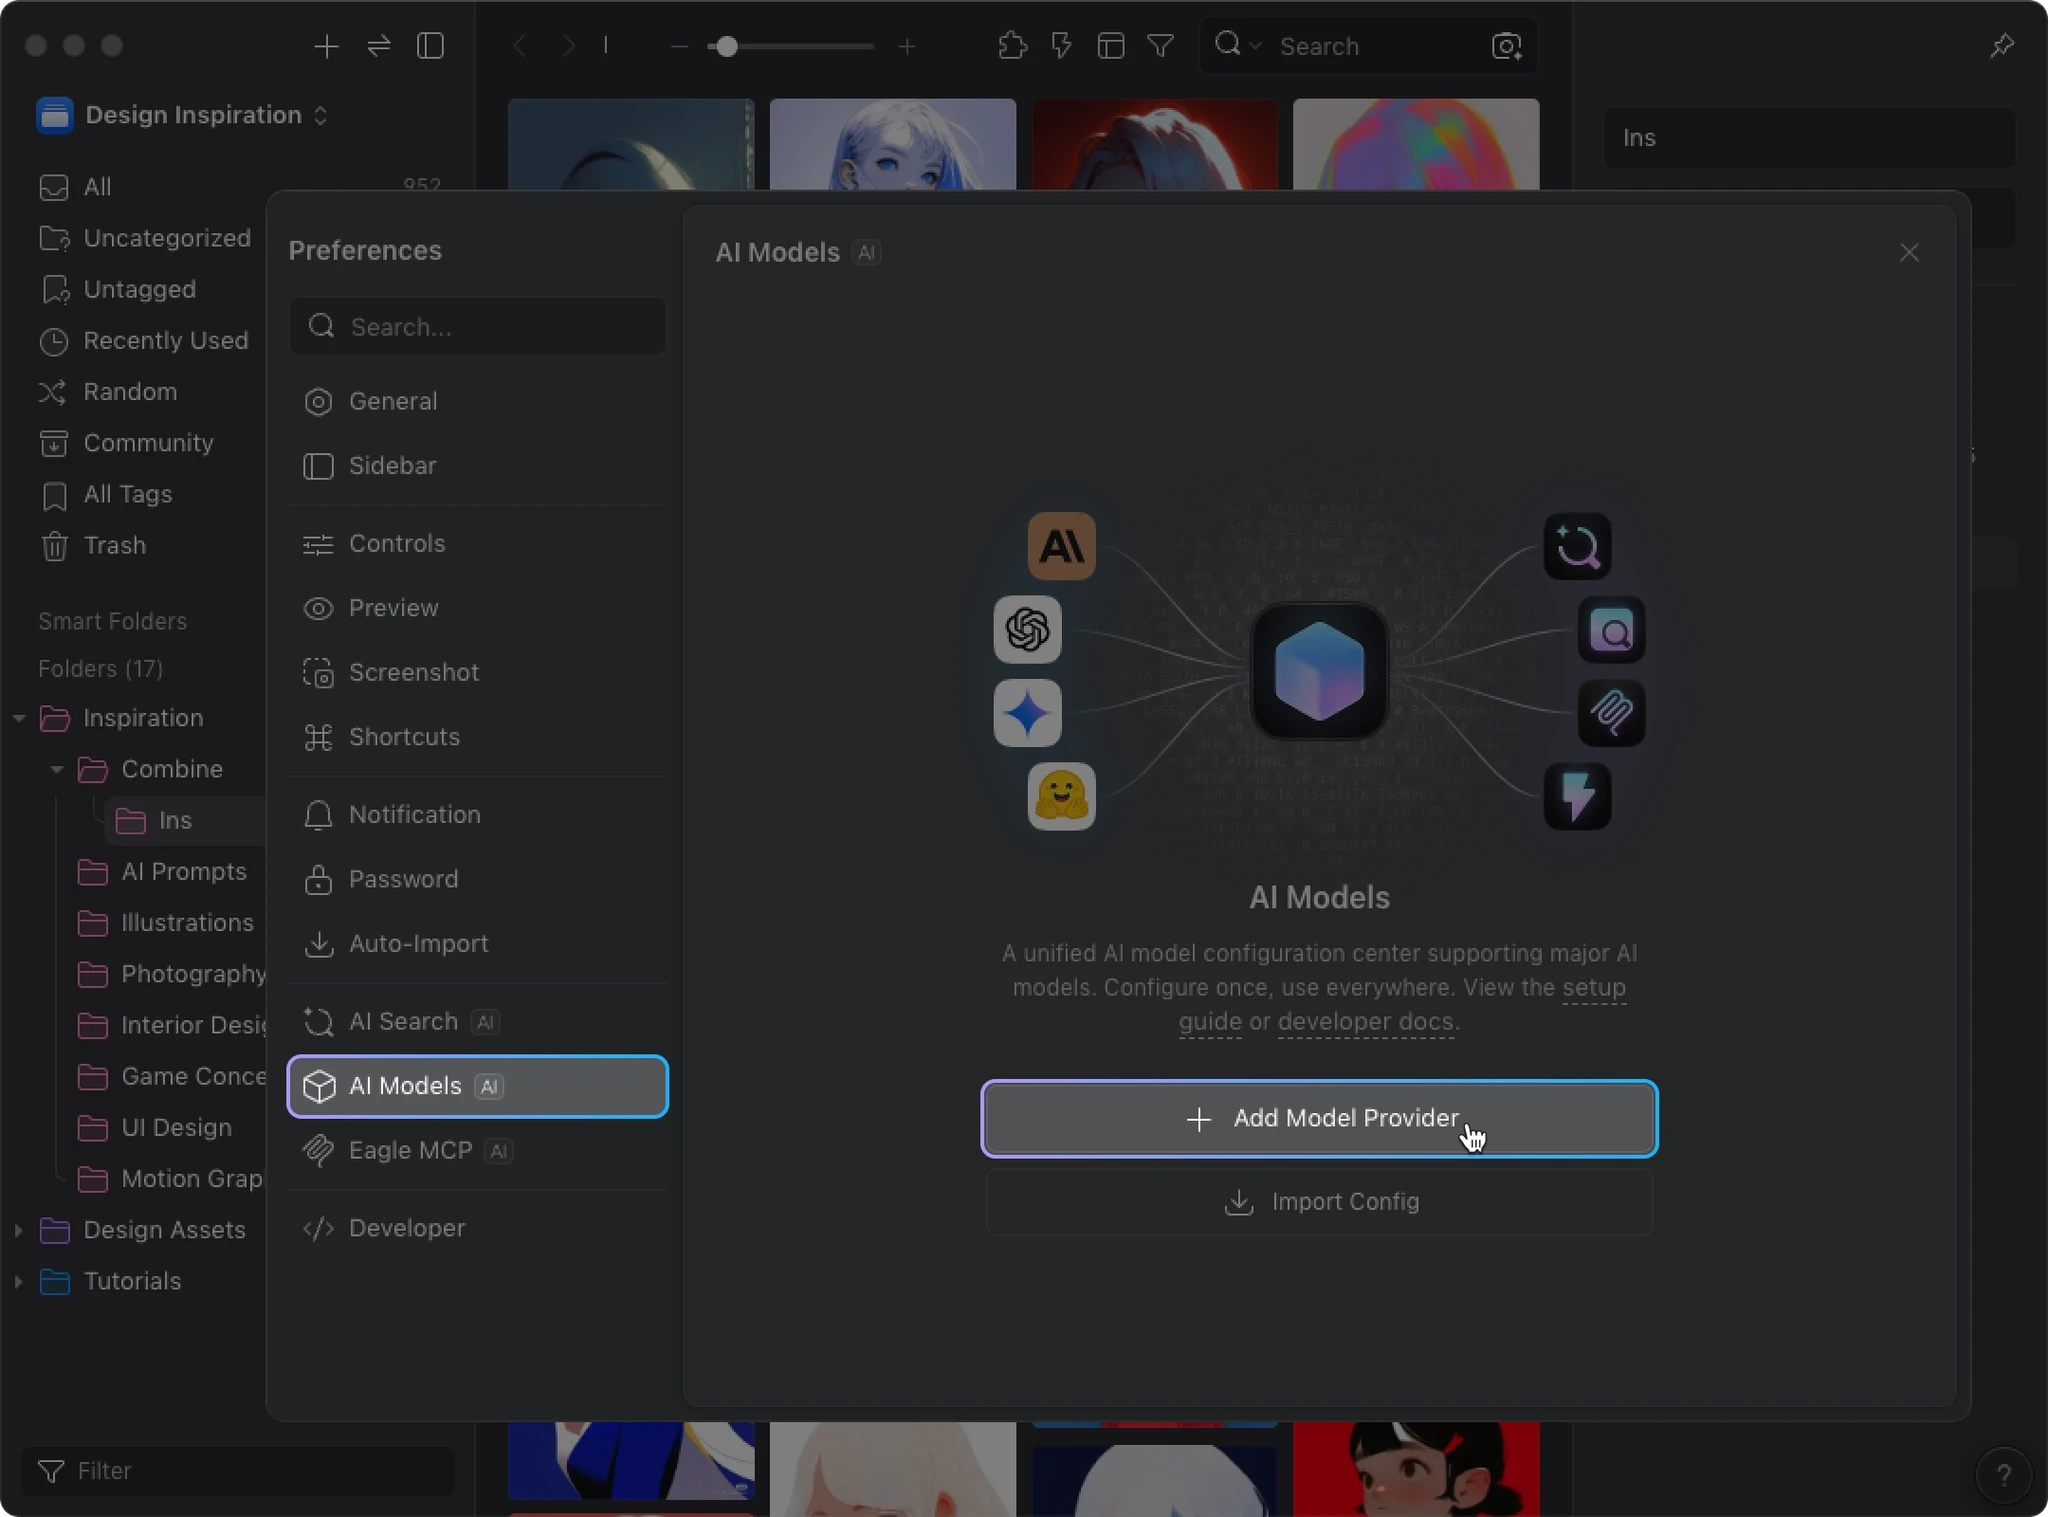
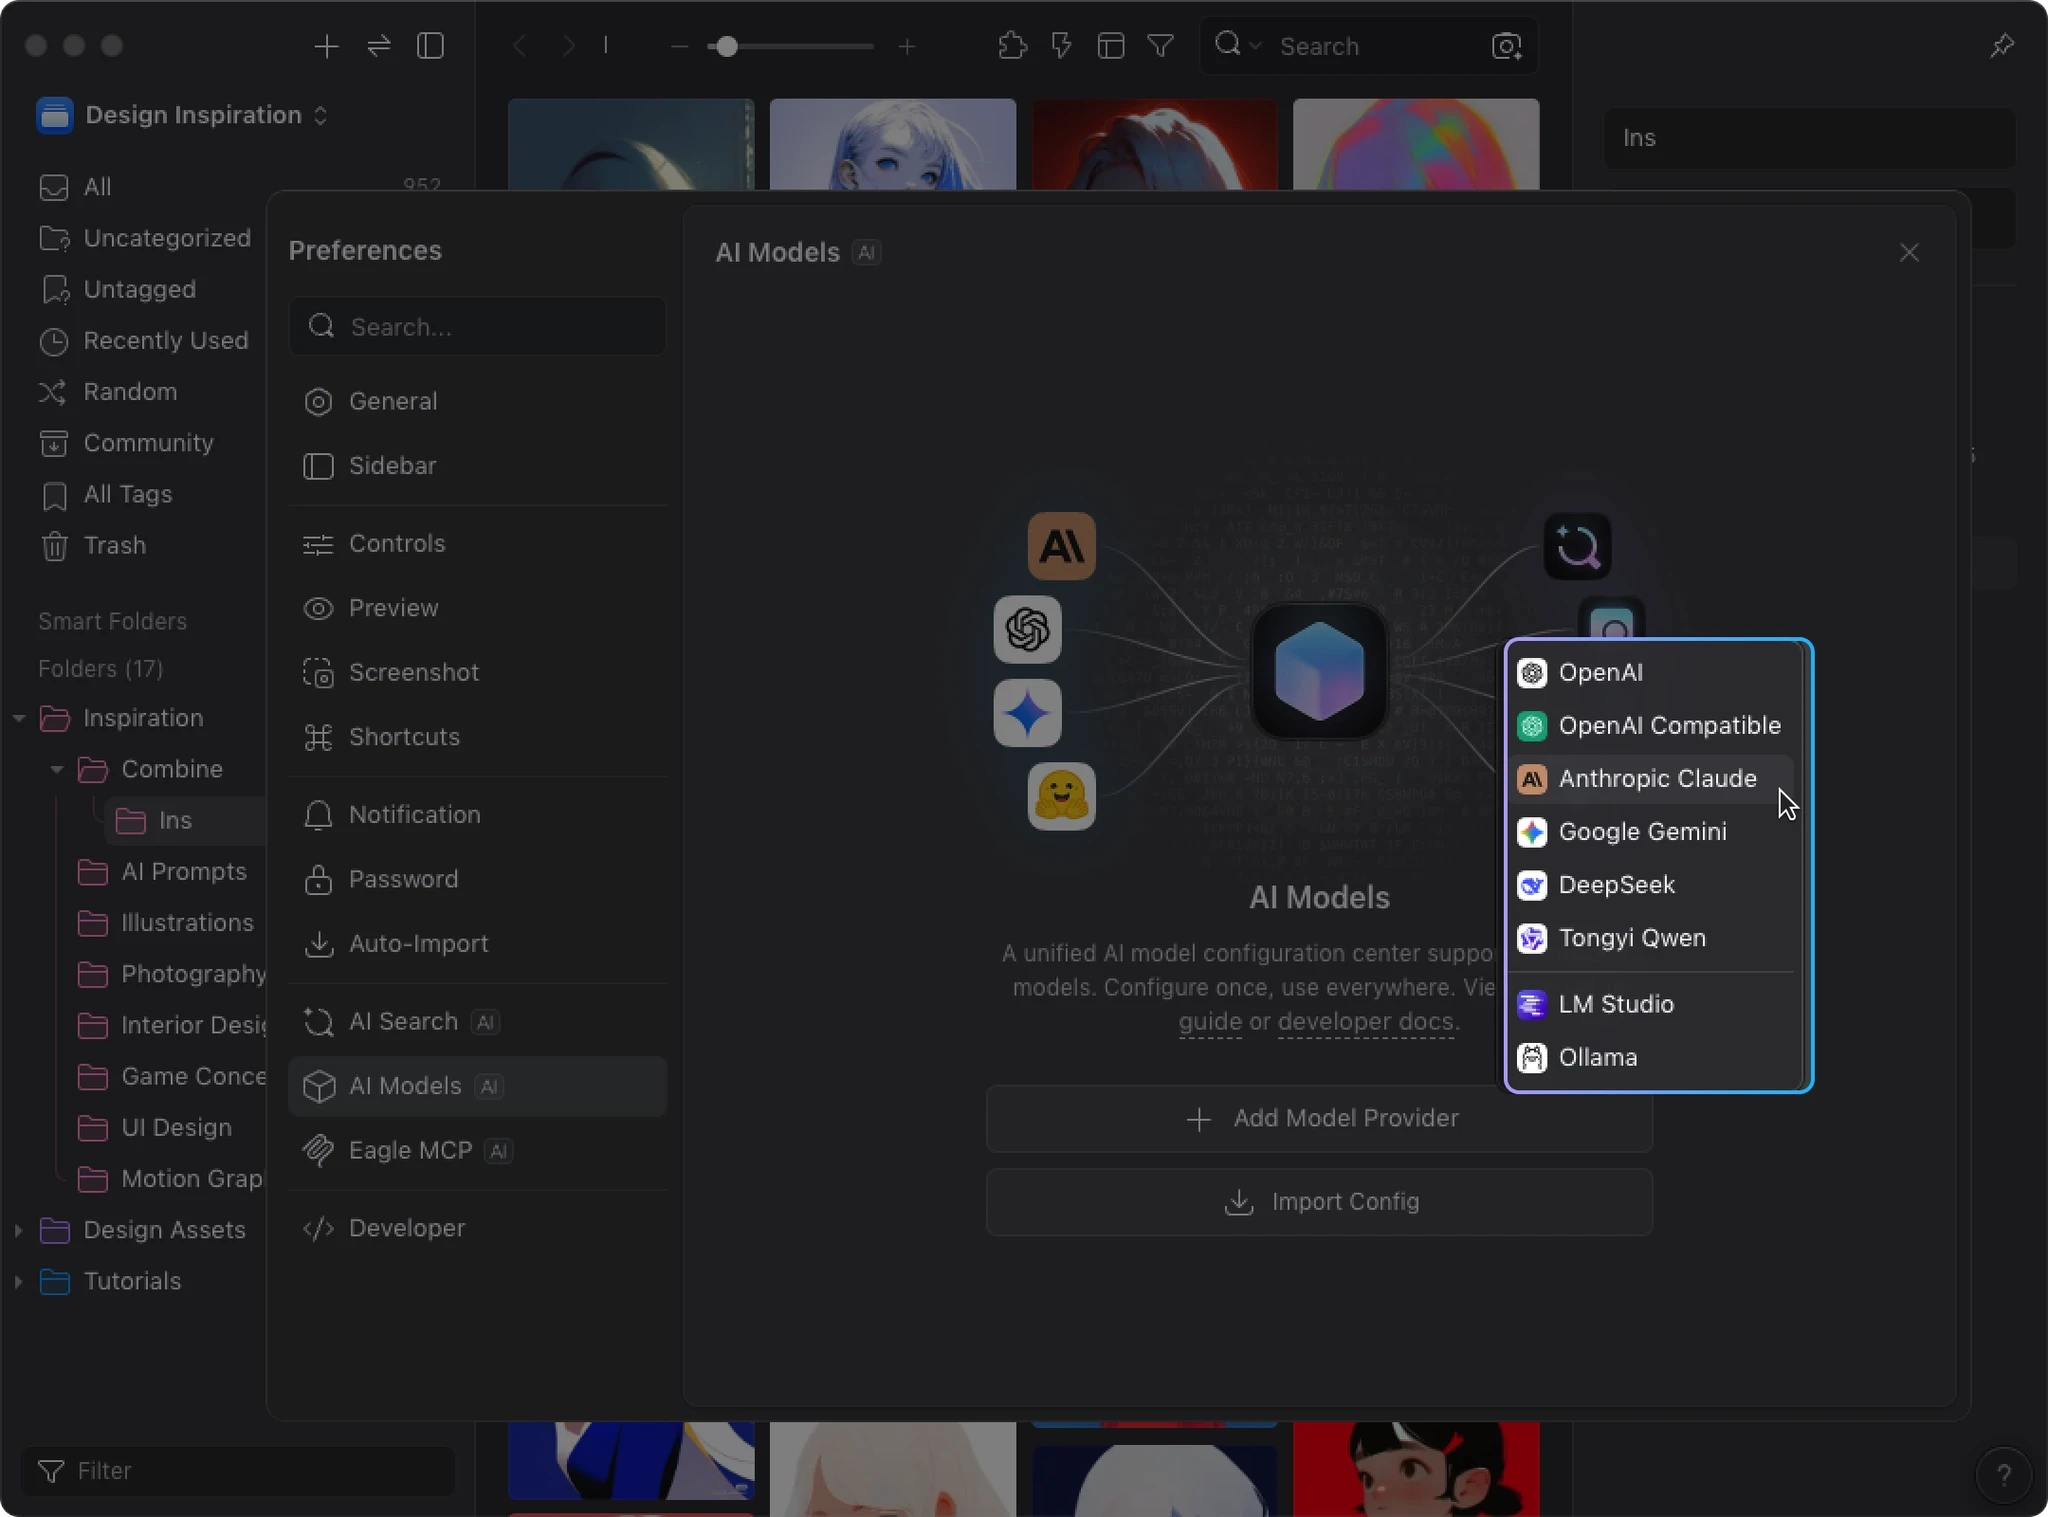
- Click “Add Model Provider” and select your provider (we’ll use Claude here)

- Enter your API Key and click “Create”
Set the Default Model
After connecting your API Key, set the “Vision Model” under Default Models.
AI Action needs to "see" your images to analyze them, so a Vision Model is required. Without one, AI Action won’t work.
For detailed model configuration steps, see the AI Models Configuration Guide.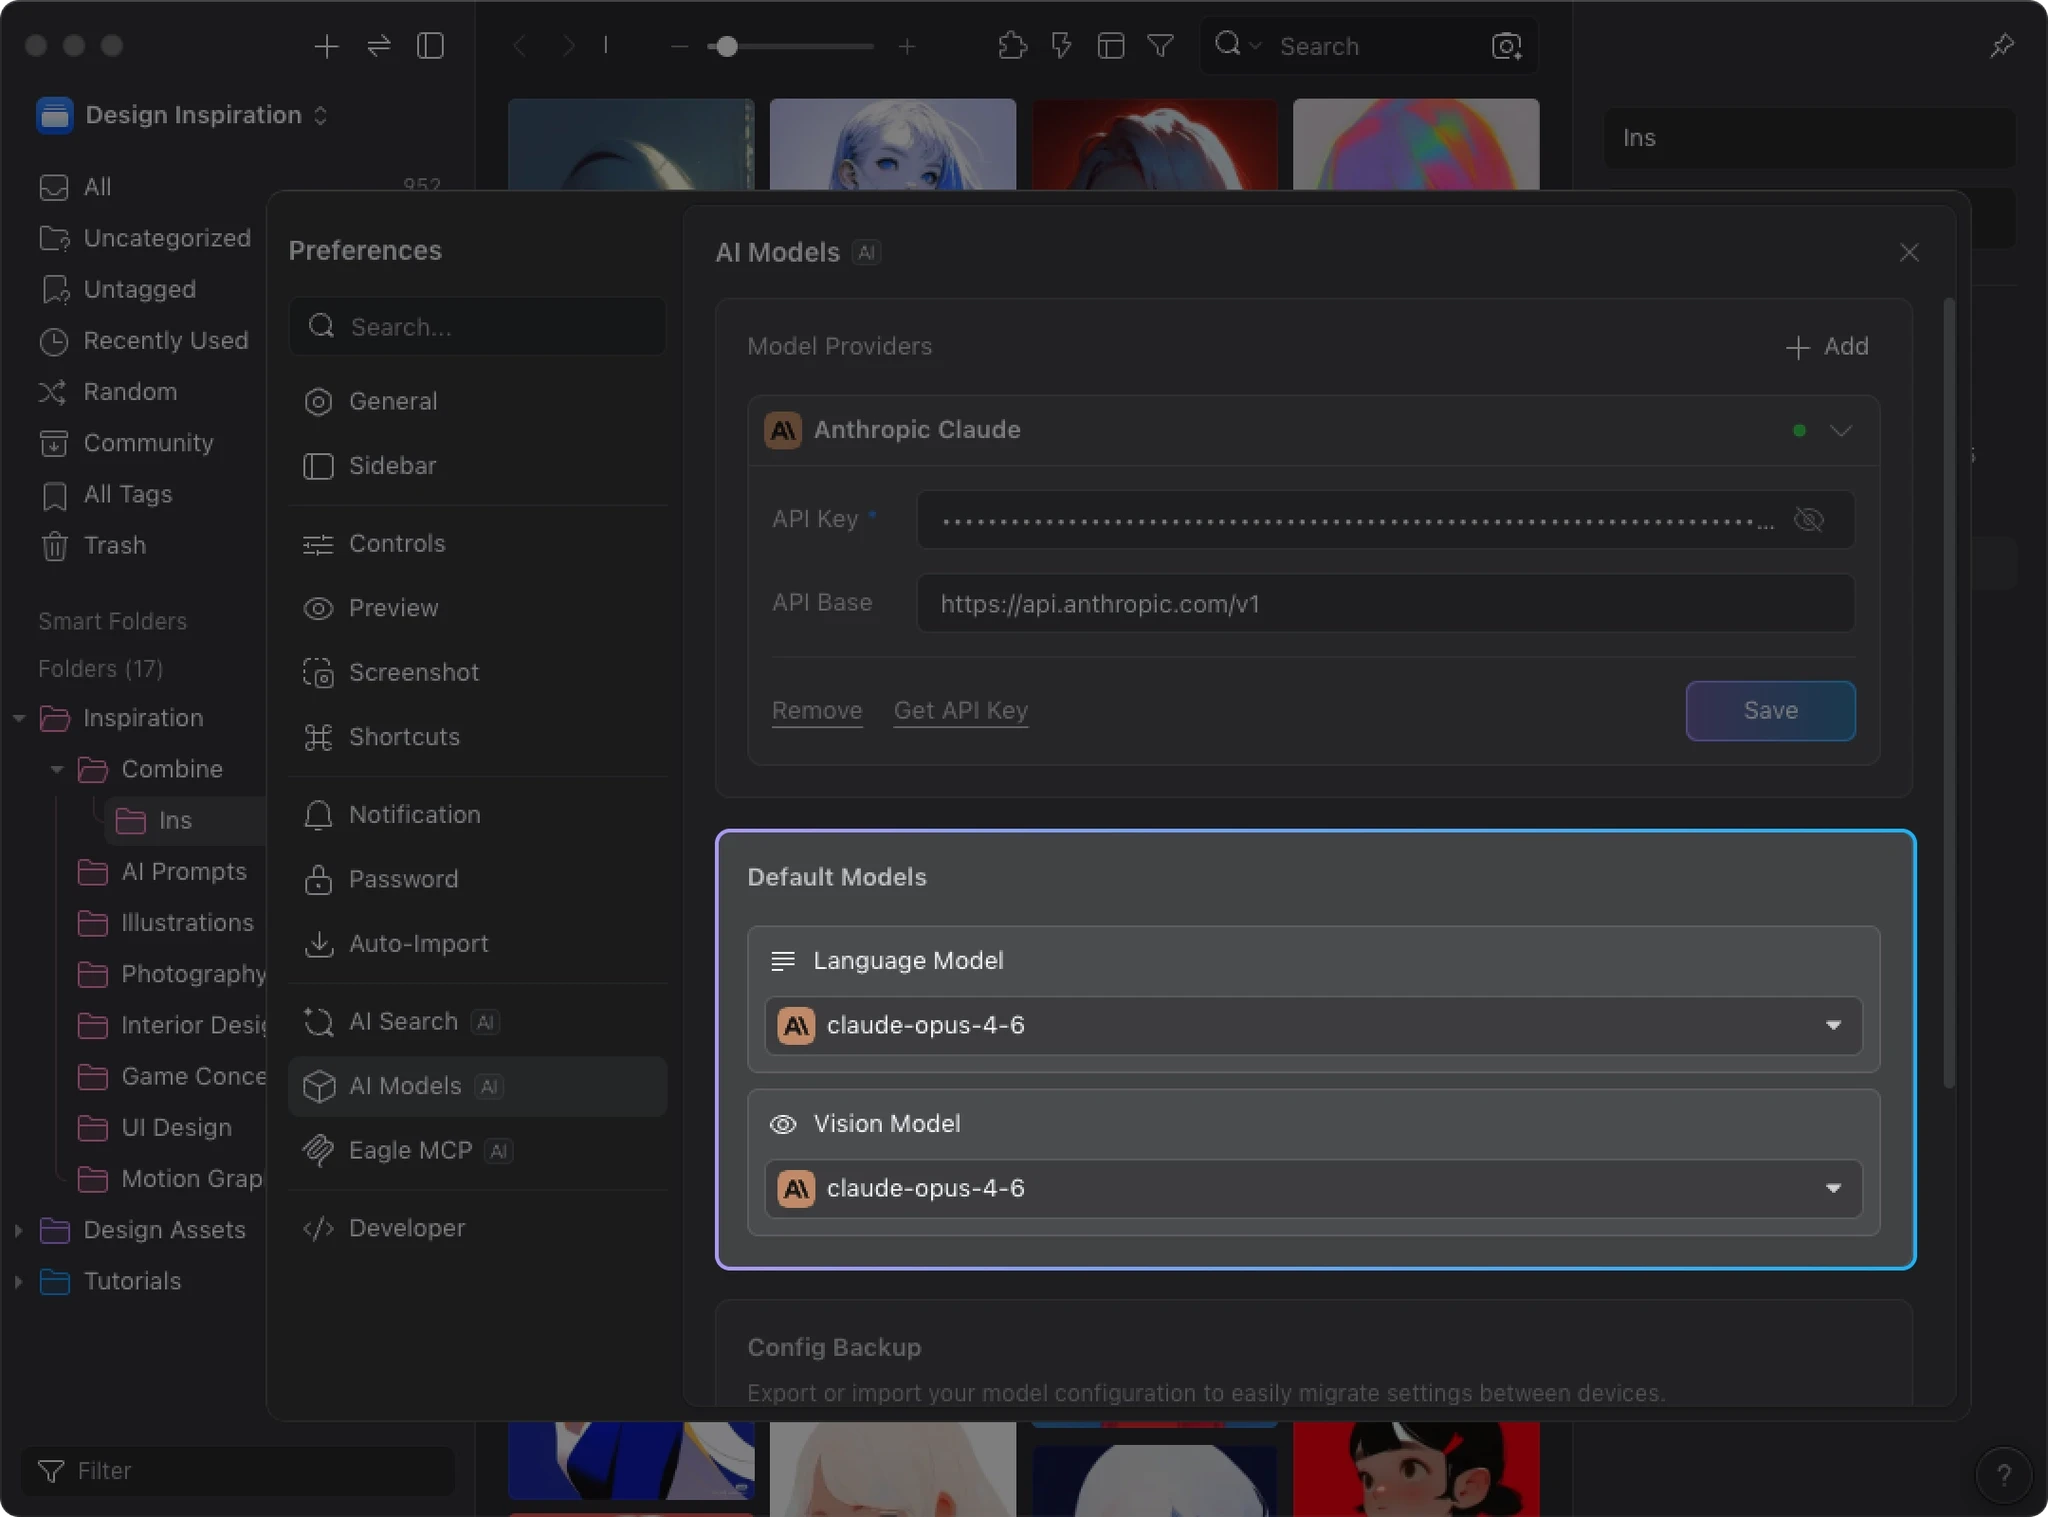
We recommend the Claude model family. Here’s a quick guide:
| Use Case | Recommended Model |
|---|---|
| Best results, budget is flexible | Claude Opus 4.6 |
| Balanced quality and cost | Claude Sonnet 4.6 |
| Budget-friendly, lighter tasks | Claude Haiku 4.5 |
Minimum Requirements for Local Models (e.g. LM Studio)
If you’d like to run models locally using tools like LM Studio instead of cloud APIs, make sure your hardware meets the following requirements.
Hardware Requirements
Running large language models requires a dedicated GPU with at least 12 GB of VRAM.
Model Recommendations
Different tasks have different model requirements:
| Use Case | Minimum Model | Recommended Model |
|---|---|---|
| AI Rename, AI Description | Qwen3 4B | Qwen3 8B |
| AI Tags, AI Folders (auto-sorting) | Qwen3 8B | Larger models |
AI Rename / AI Description These tasks are relatively simple. Qwen3 4B is usually sufficient; for better stability and quality, go with 8B.
AI Tags / AI Folders These tasks involve more complex reasoning and classification, so they require at least Qwen3 8B or larger.
Local Models vs Online Models
If your hardware is limited, online models (e.g. Claude, OpenAI) are usually the better choice:
- Faster: Online models respond much faster than local ones
- Higher quality: Commercial API models outperform what local models can deliver
- More stable: No heavy local resource usage, making long batch runs smoother
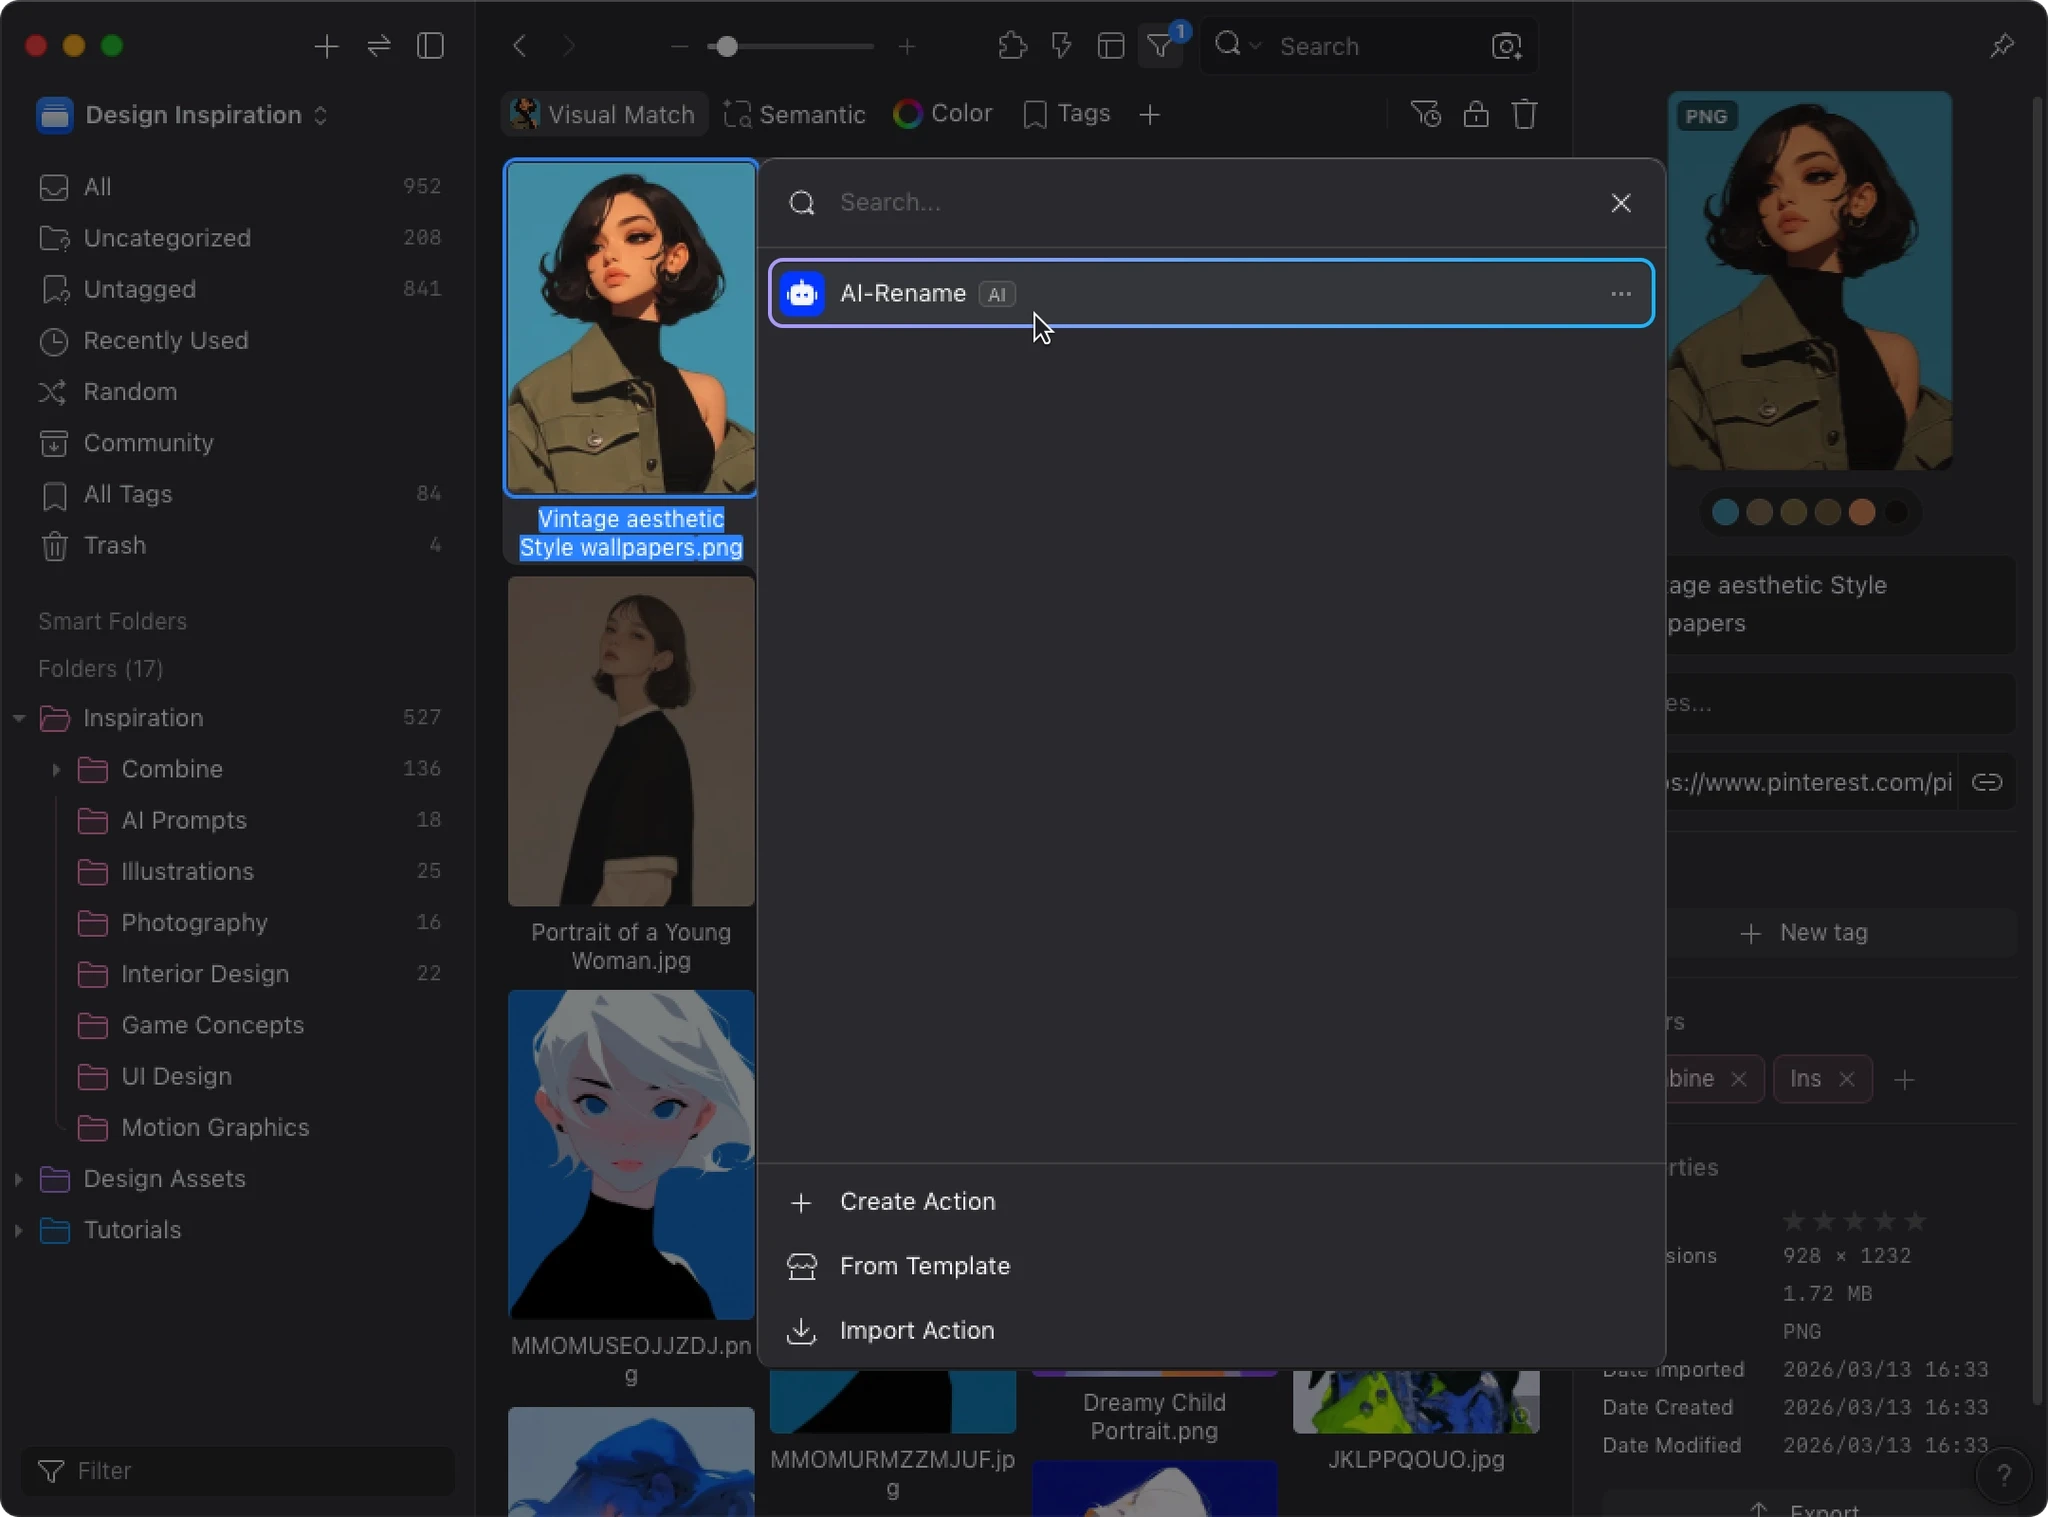
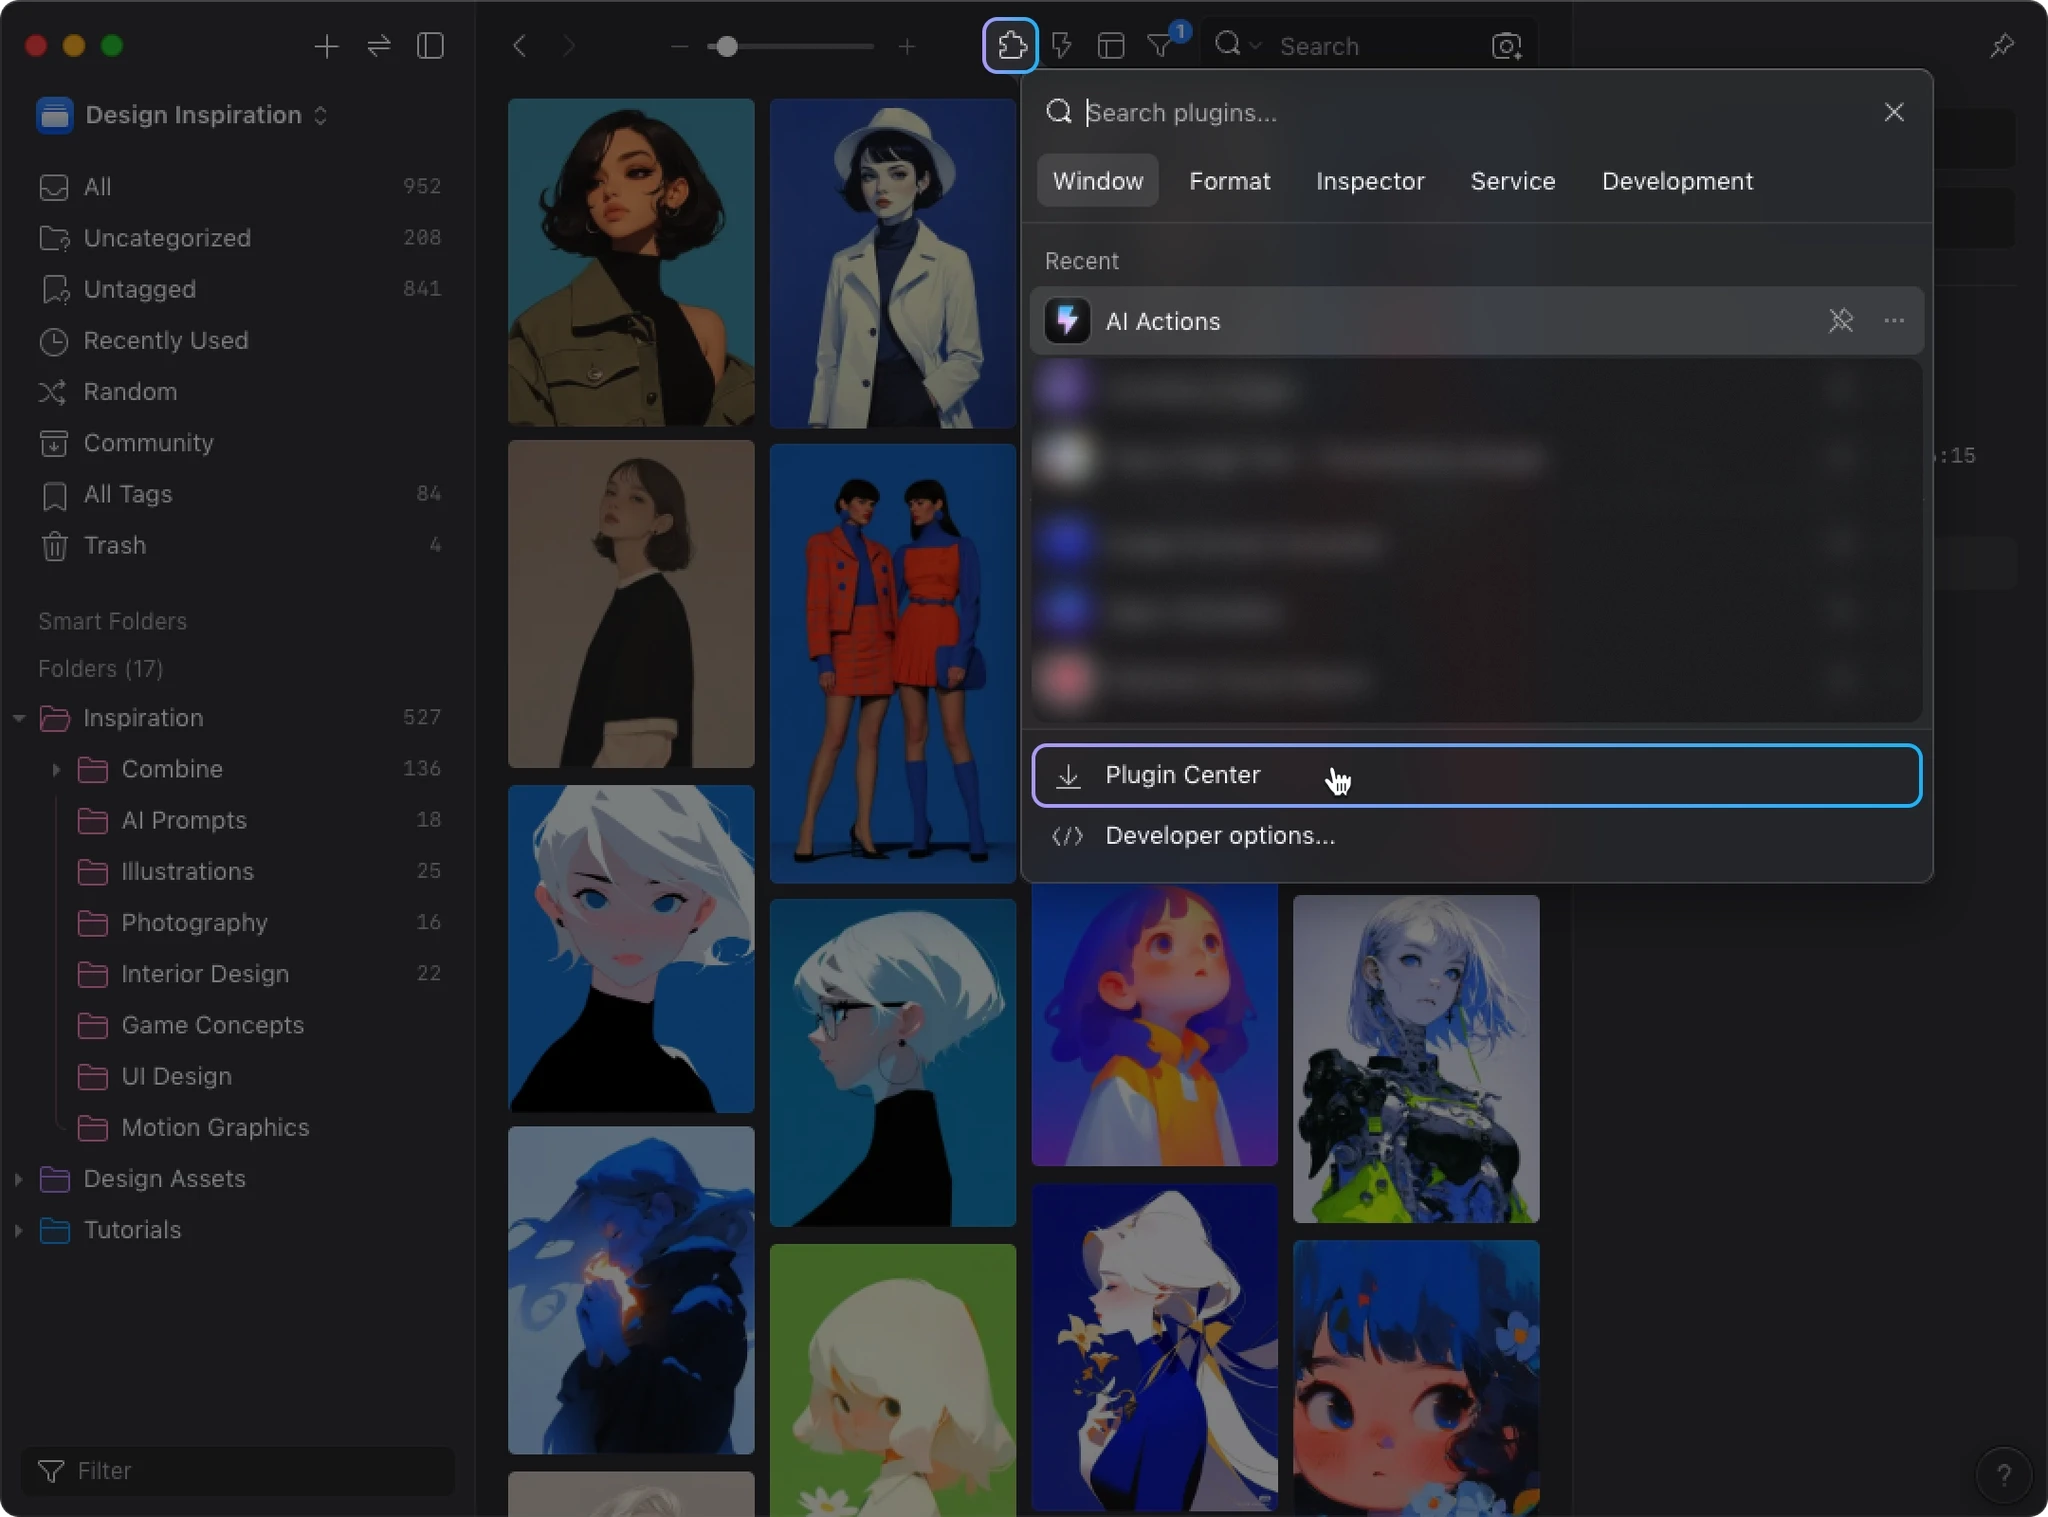
Install the AI Action Plugin
- Open Eagle → “Plugins” → “Plugin Center” → search for “AI Action” → click Install.
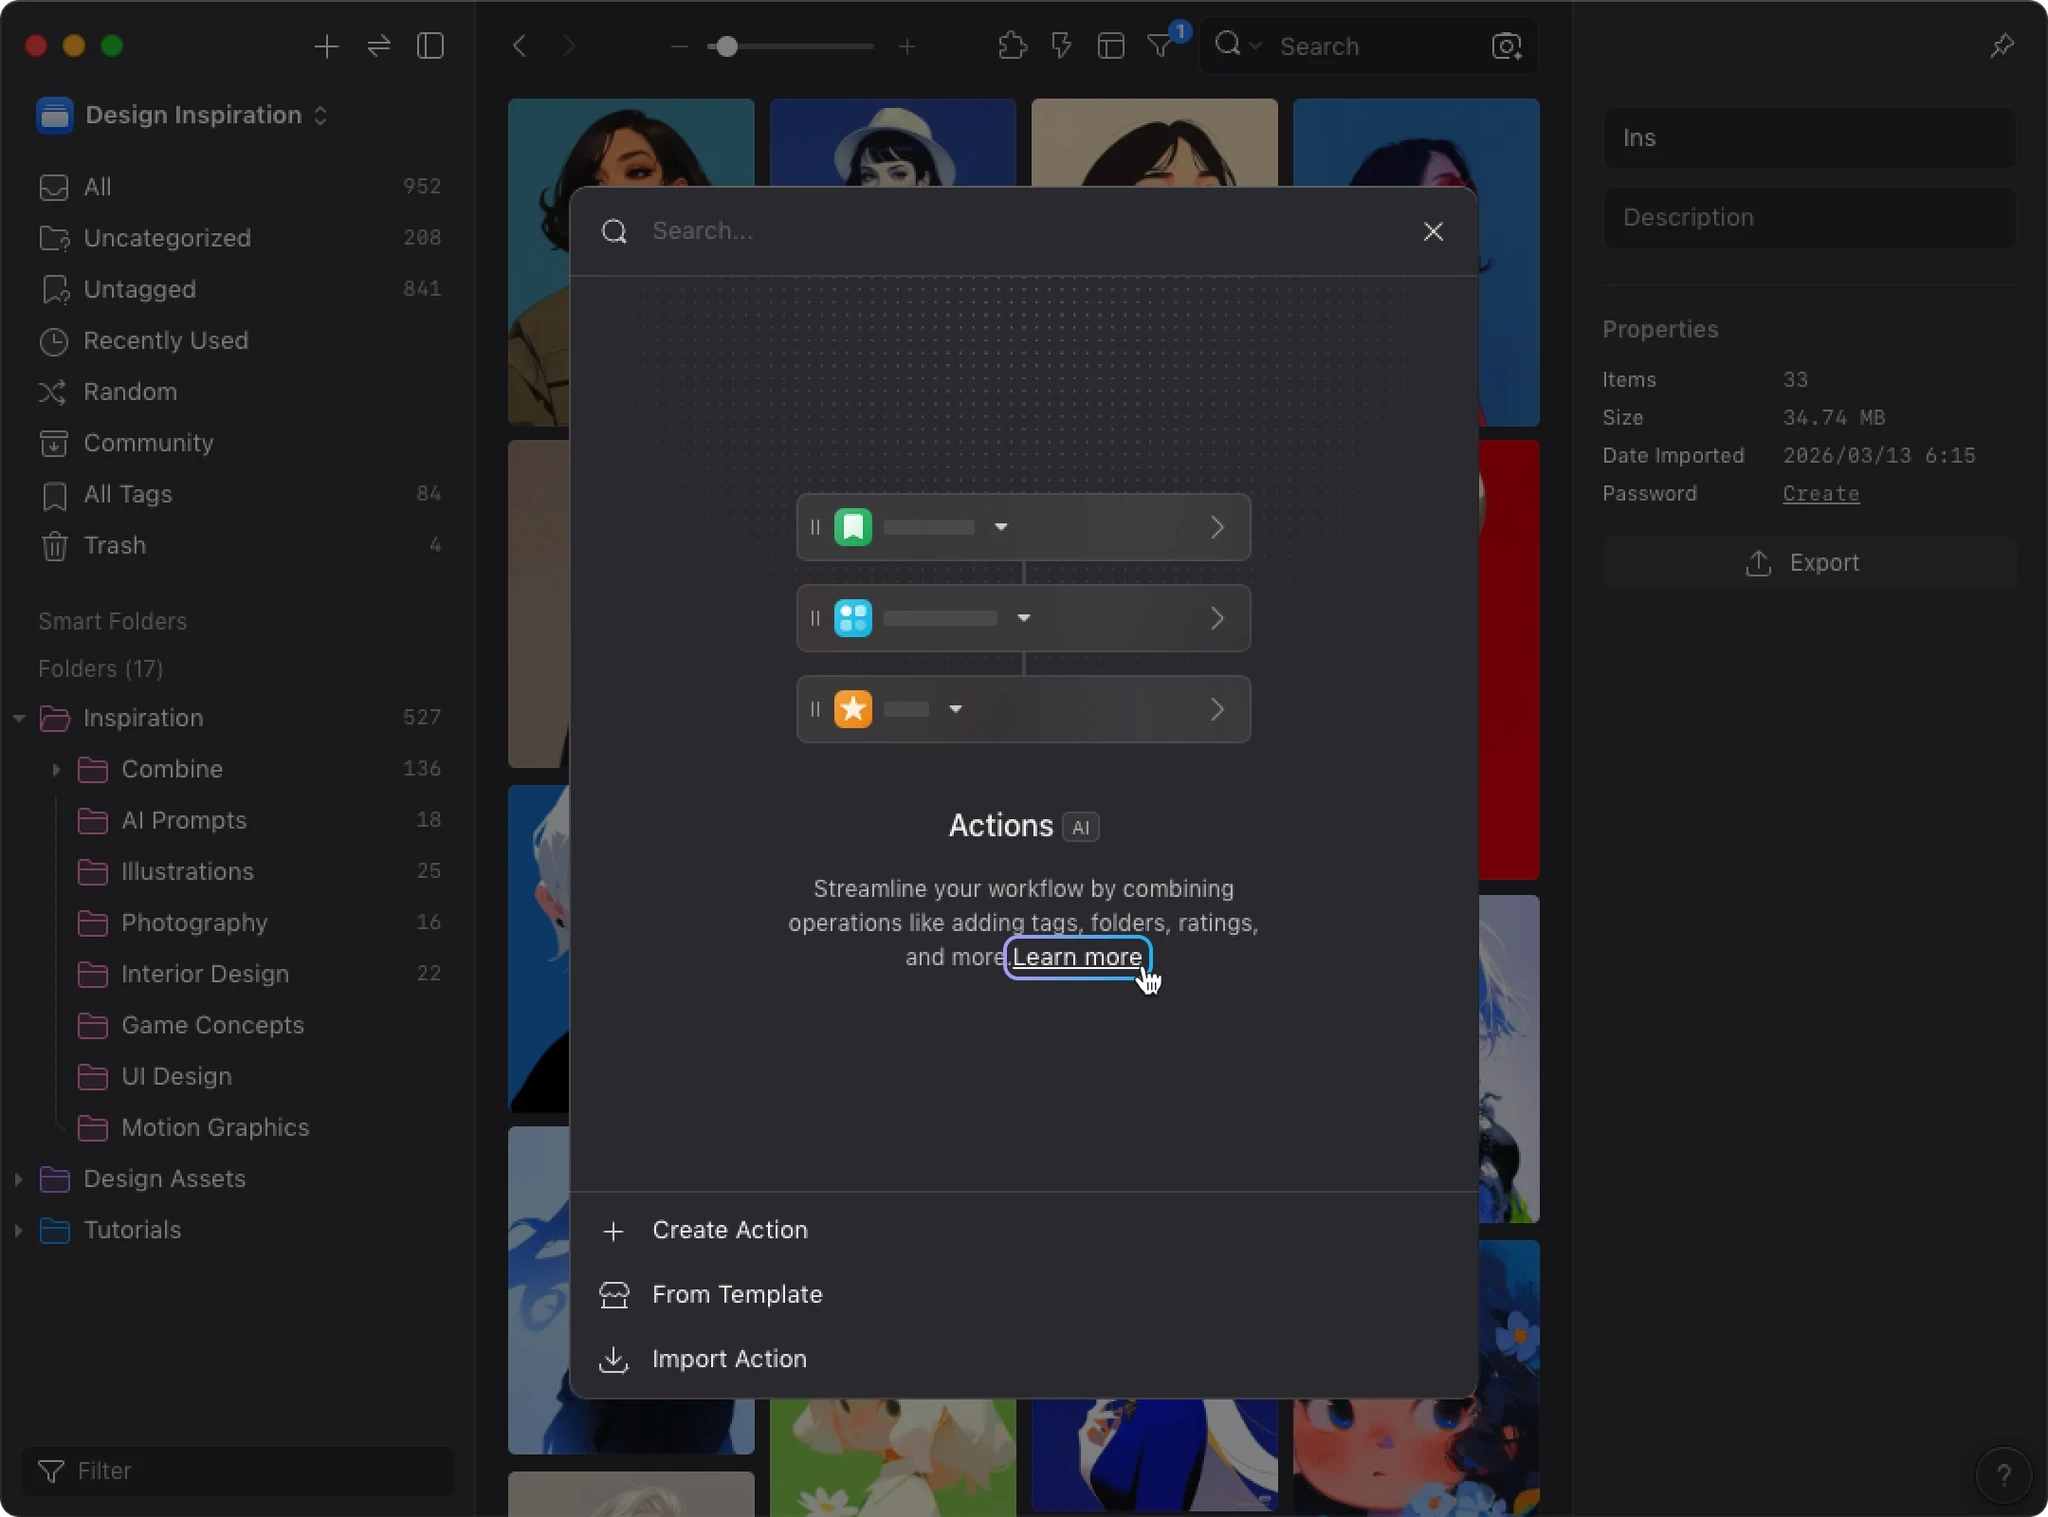
- After installation, open “Plugins” → “AI Action”.
- On first launch, you can click “Learn more” to view the feature overview. At the bottom of the window, you’ll see three options:
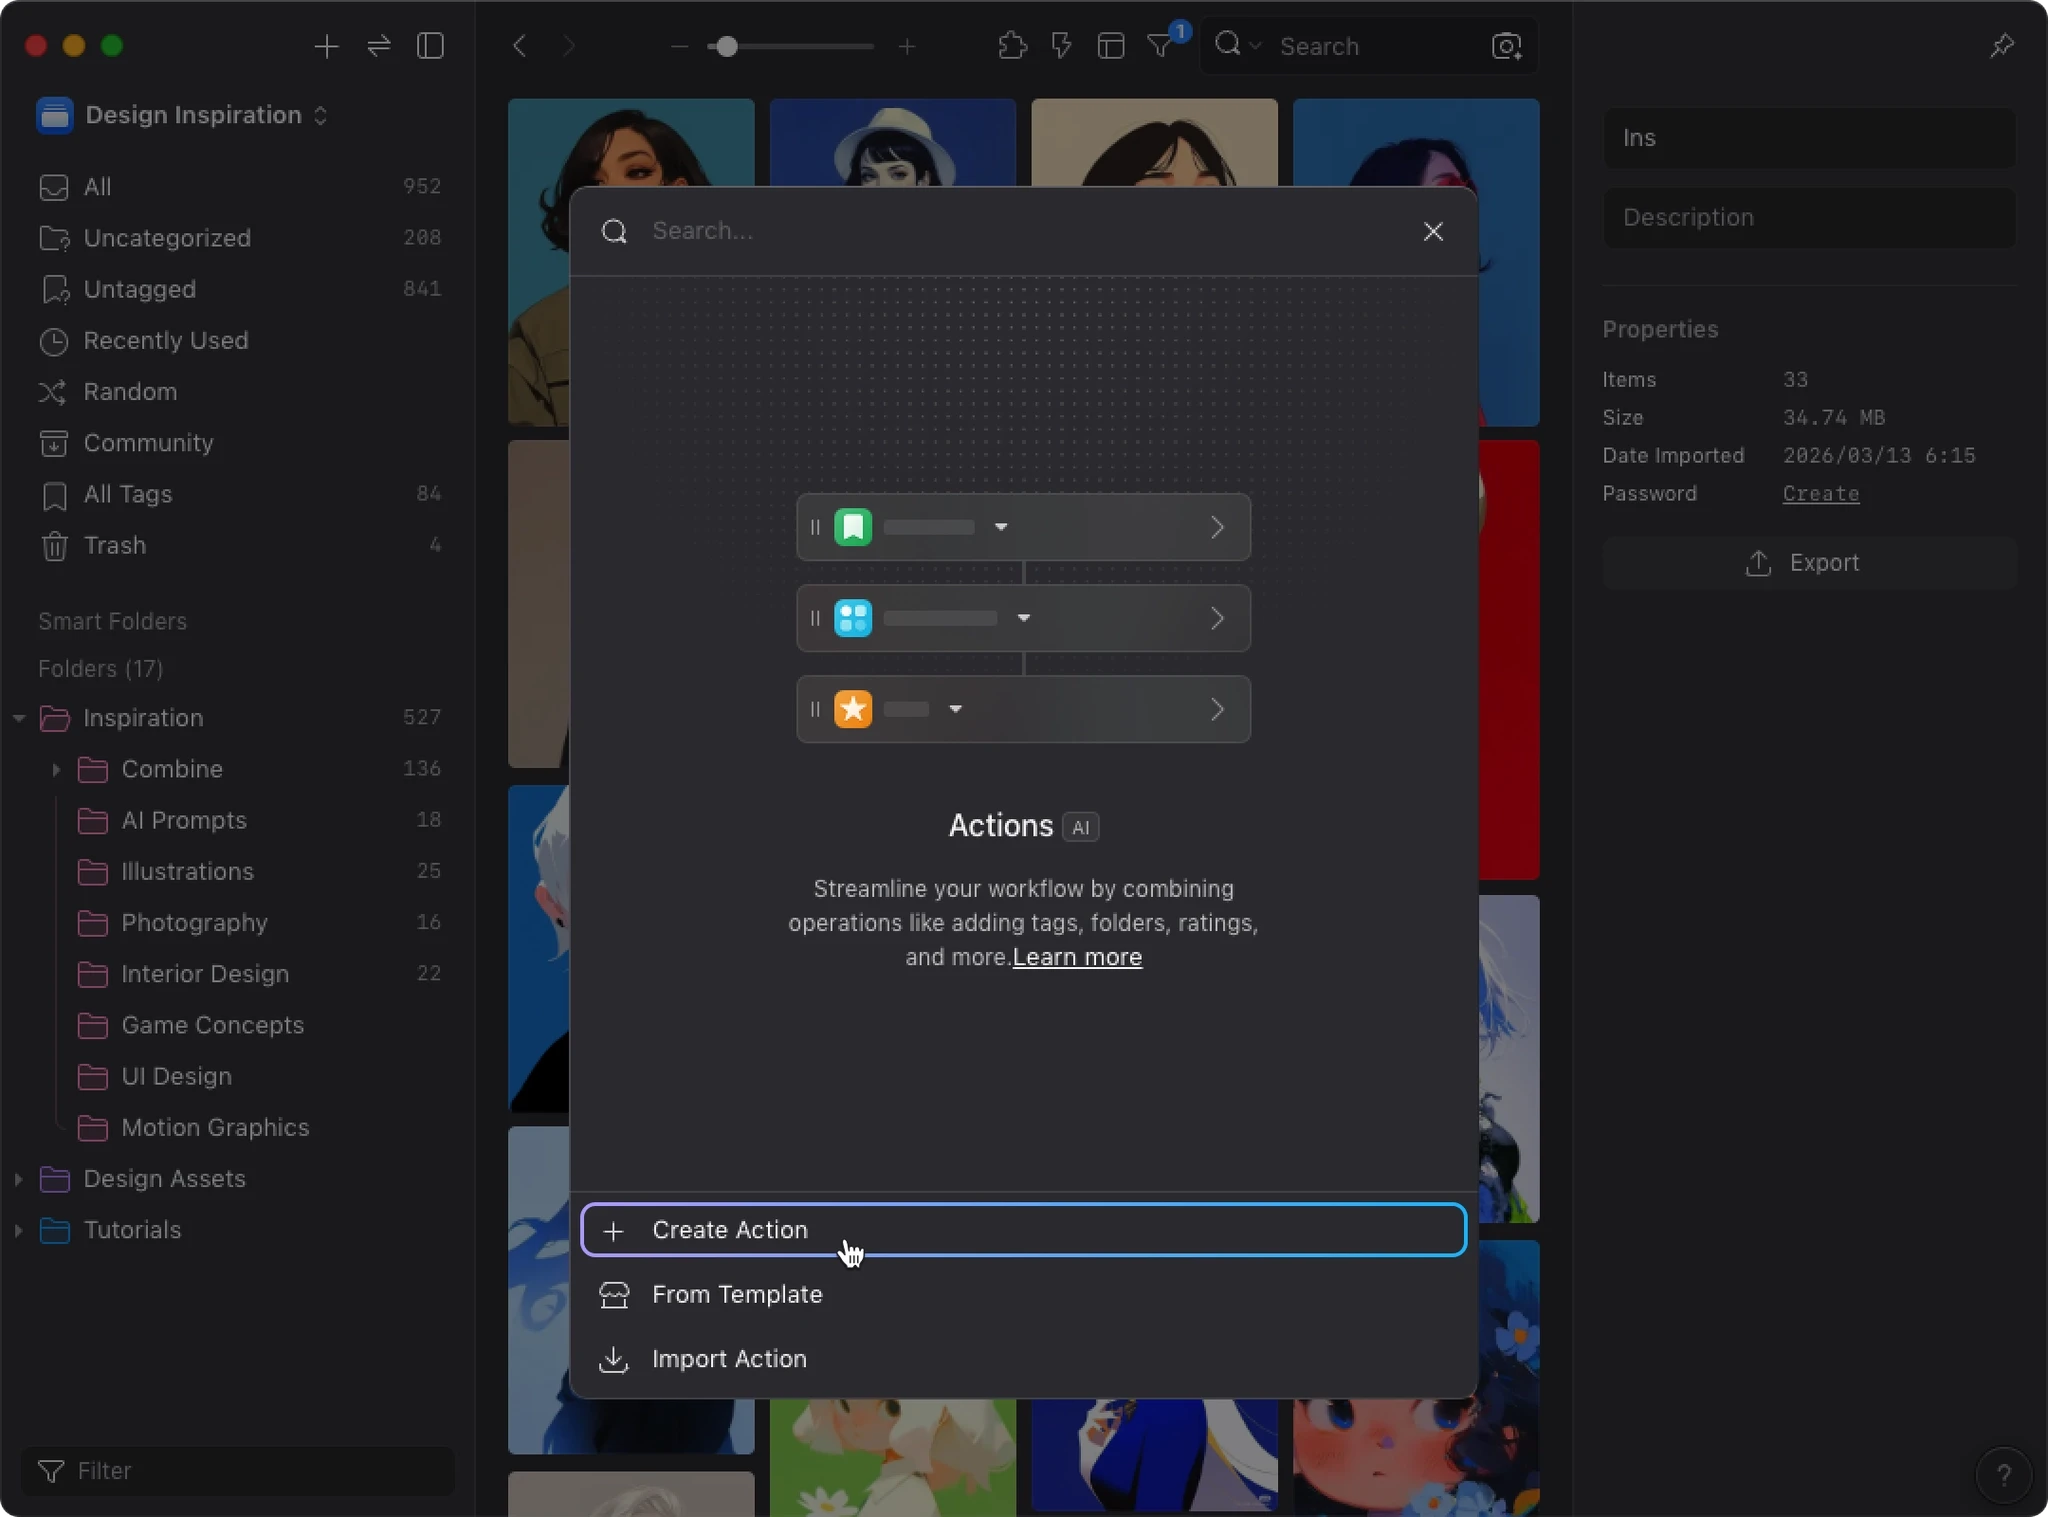
- “Create Action”: Build a new action from scratch
- “From Template”: Create from a preset template
- “Import Action”: Import an action shared by others
Create Your First AI Action
Let’s start with the simplest example: AI Rename.
1. Create an Action
- Click “Create Action”
- Choose a representative icon
- Enter an action name in the “Name” field, e.g. AI Rename
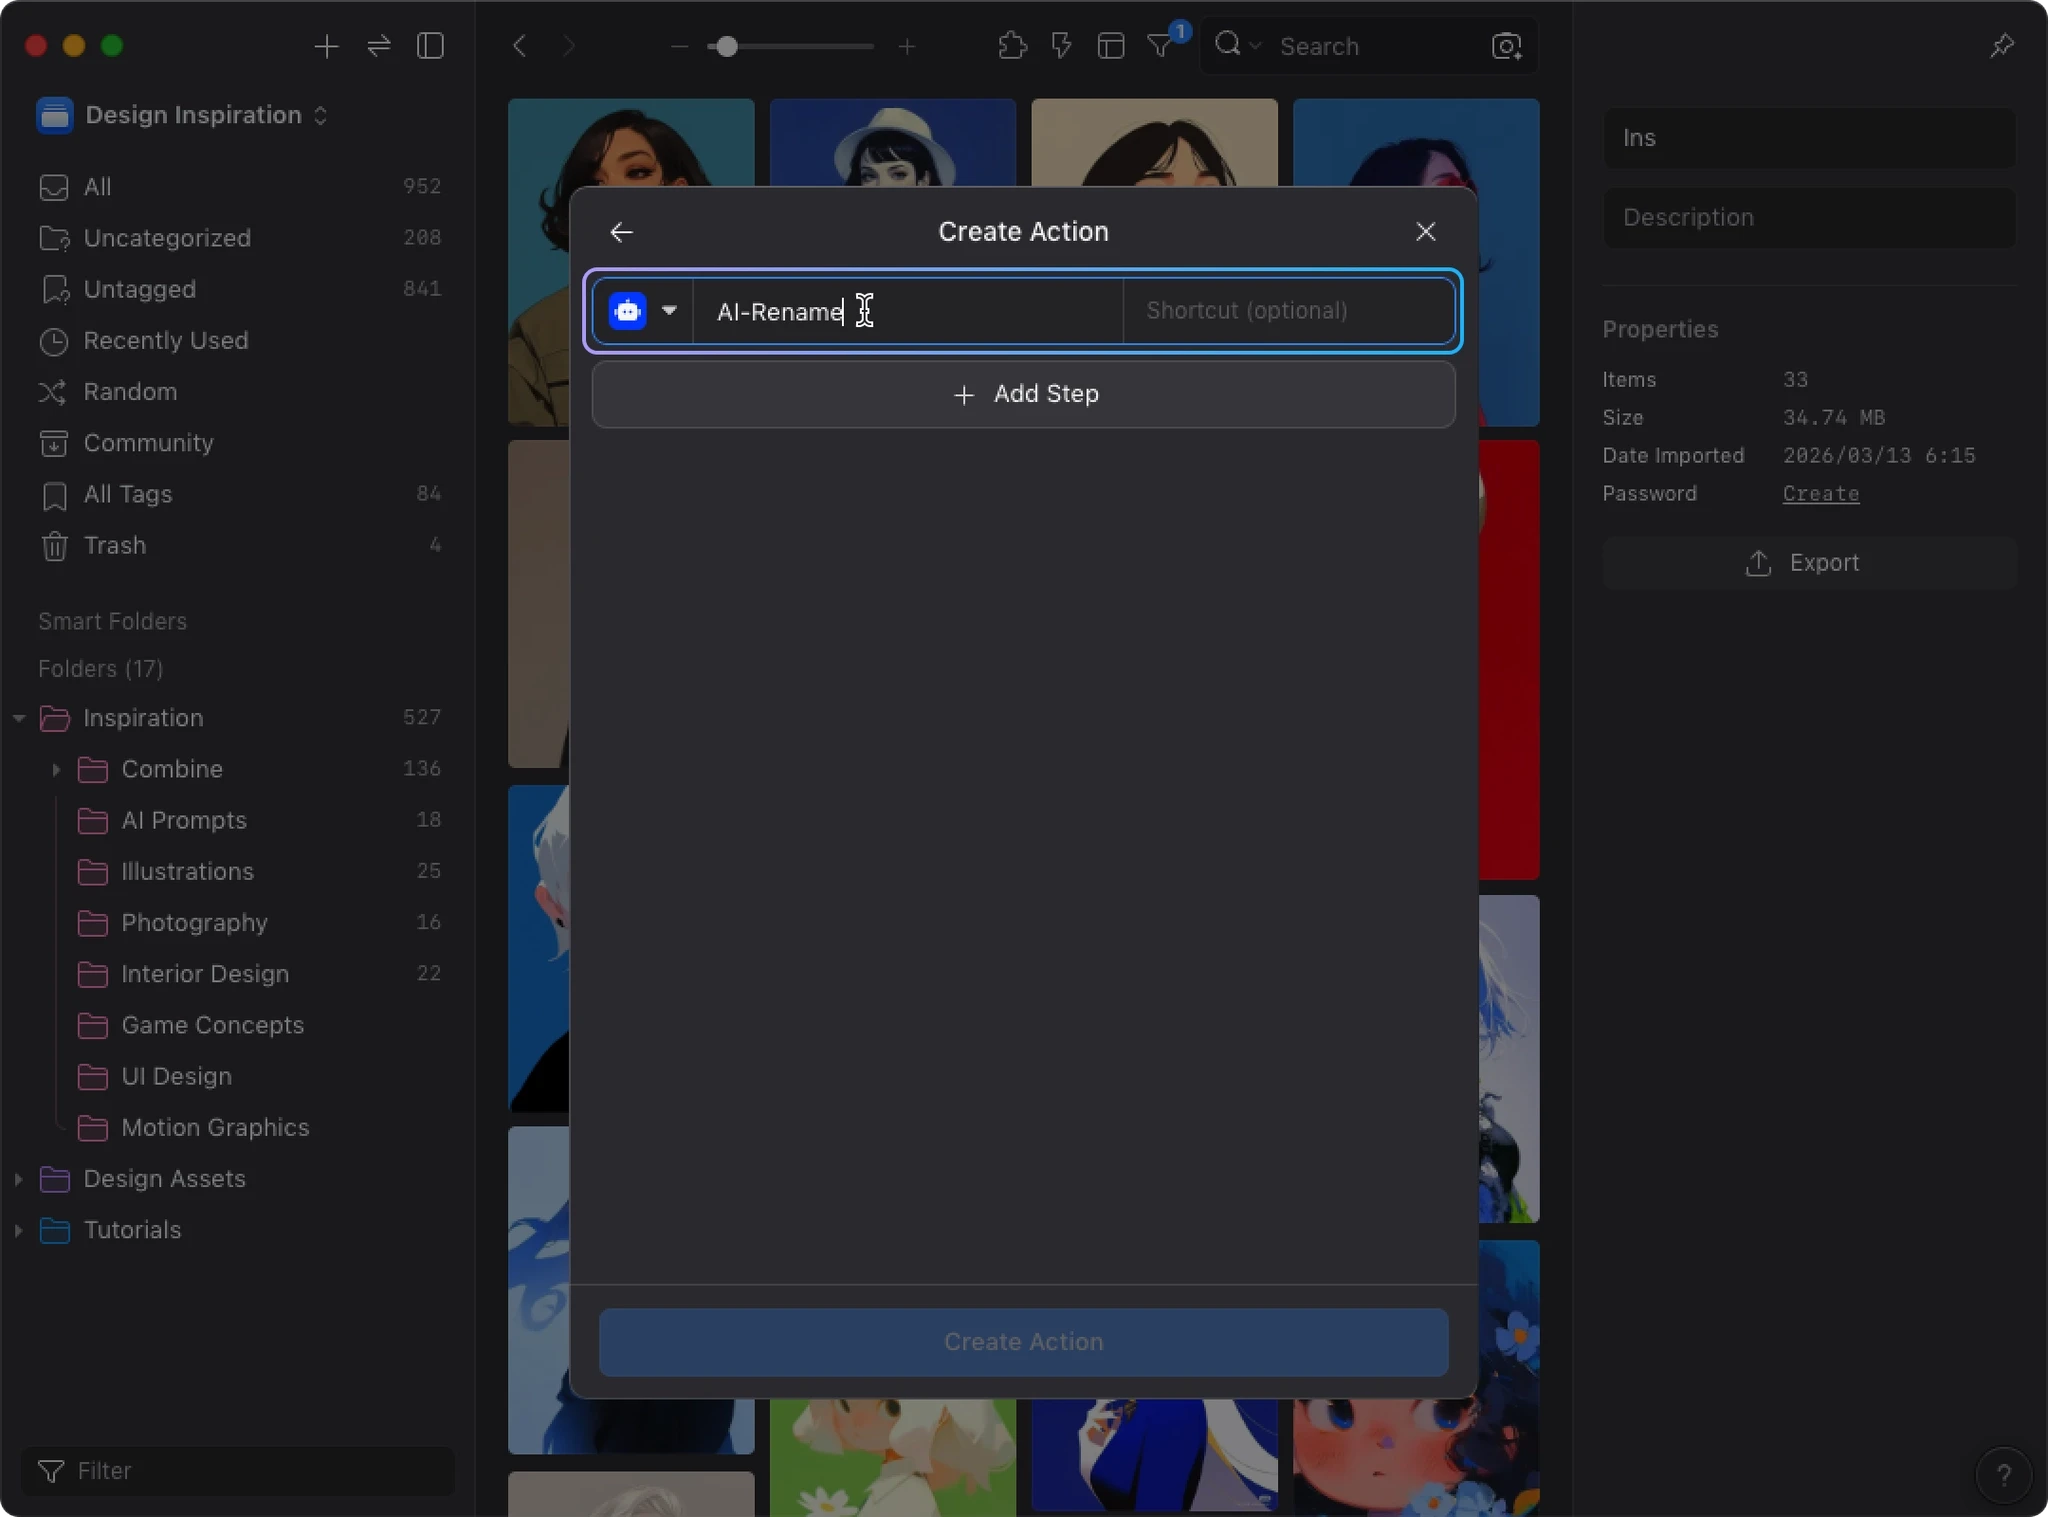
- Optionally set a keyboard shortcut
2. Add a Step
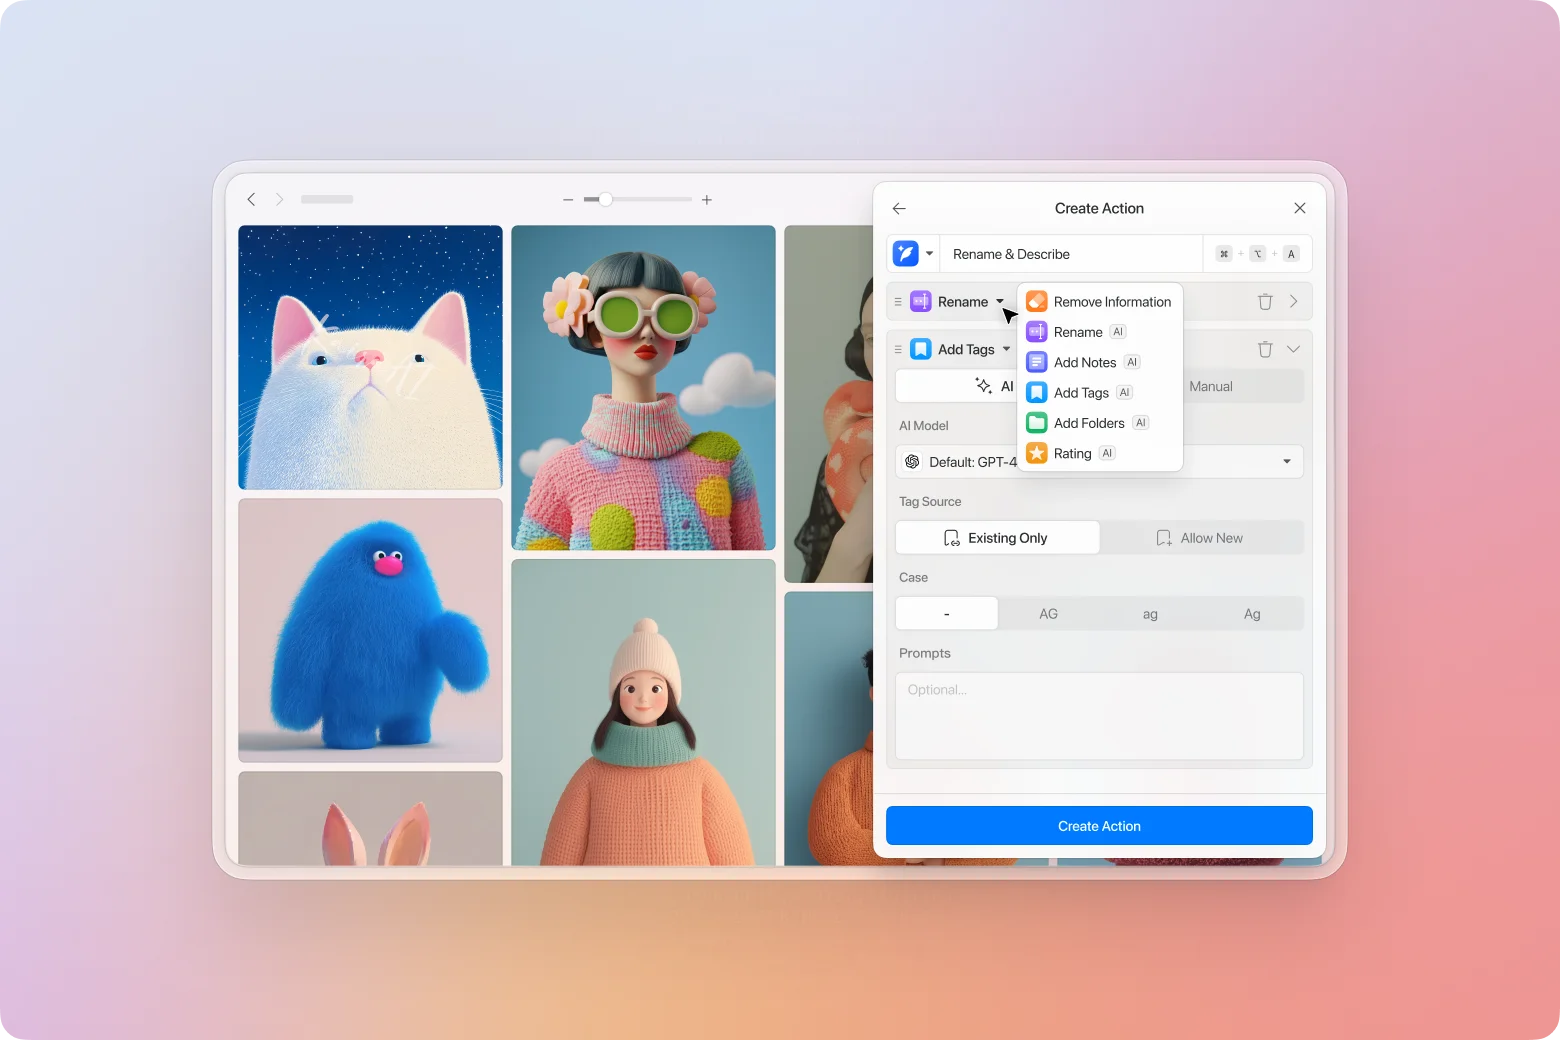
Click “+ Add Step” to see all available operation types:
- Clear Info: Clear description, link, tags, folders, or rating fields
- Rename
- Add Description
- Add Tags
- Add to Folders
- Rating
Select “Rename” for this example.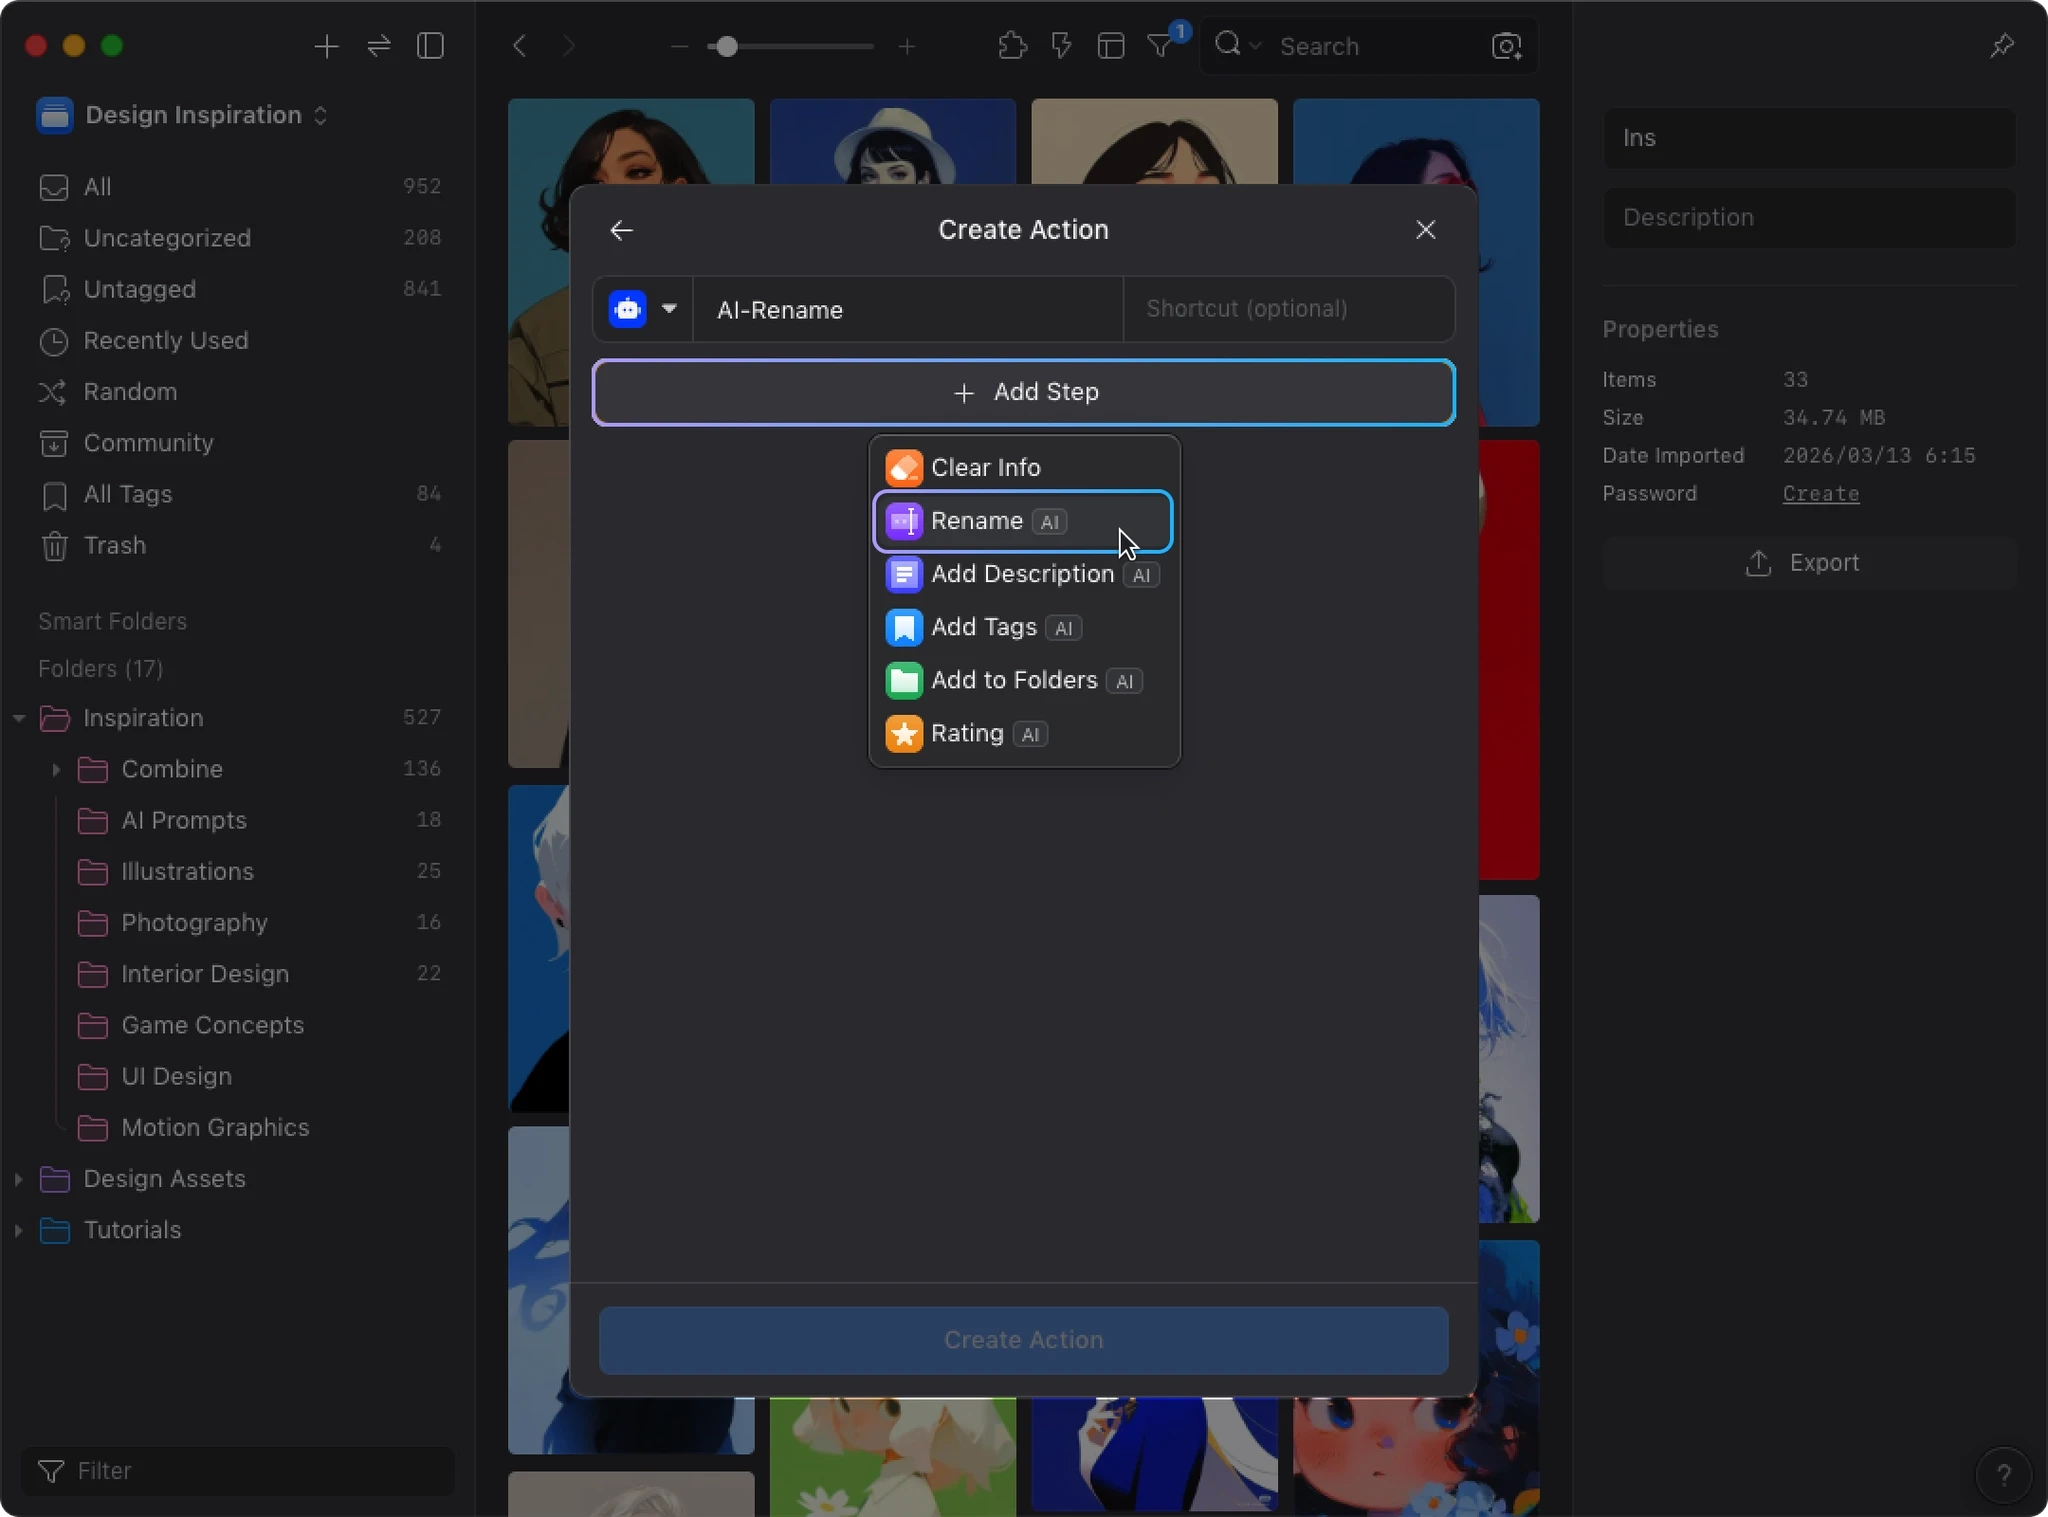
3. Use the Default Settings to Finish
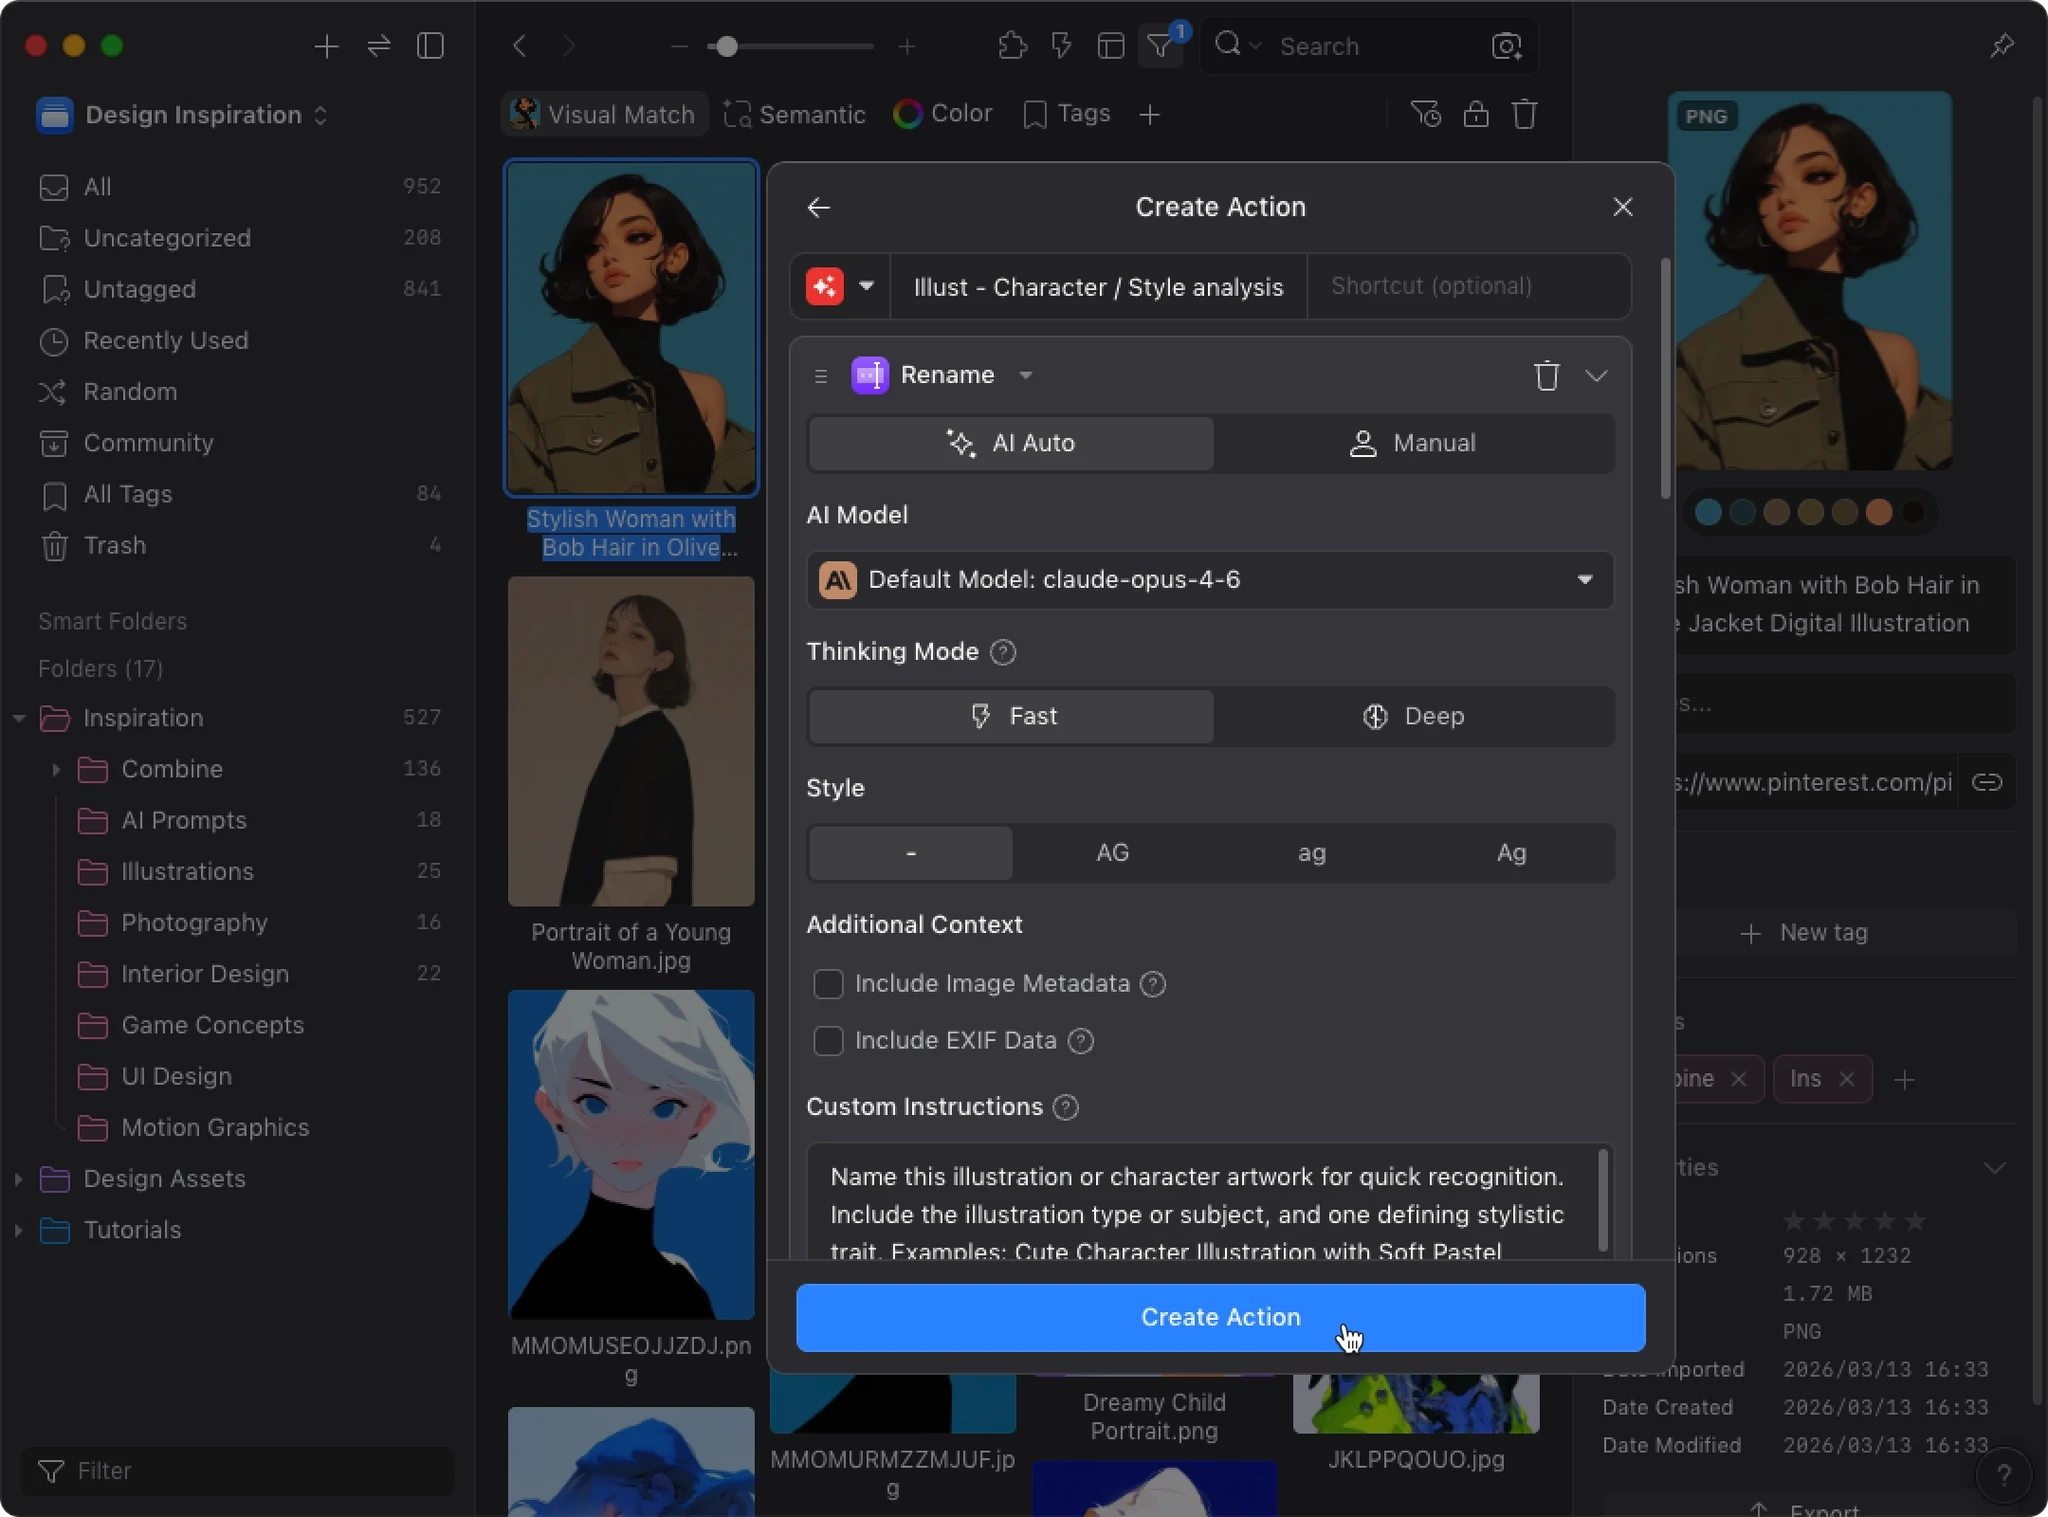
After selecting Rename, you’ll see the step’s settings panel with options for:
- AI Model
- Thinking Mode
- Style
- Additional Context
- Custom Instructions
- Output Language
For your first time, keep all the defaults. Just click “Create Action” at the bottom.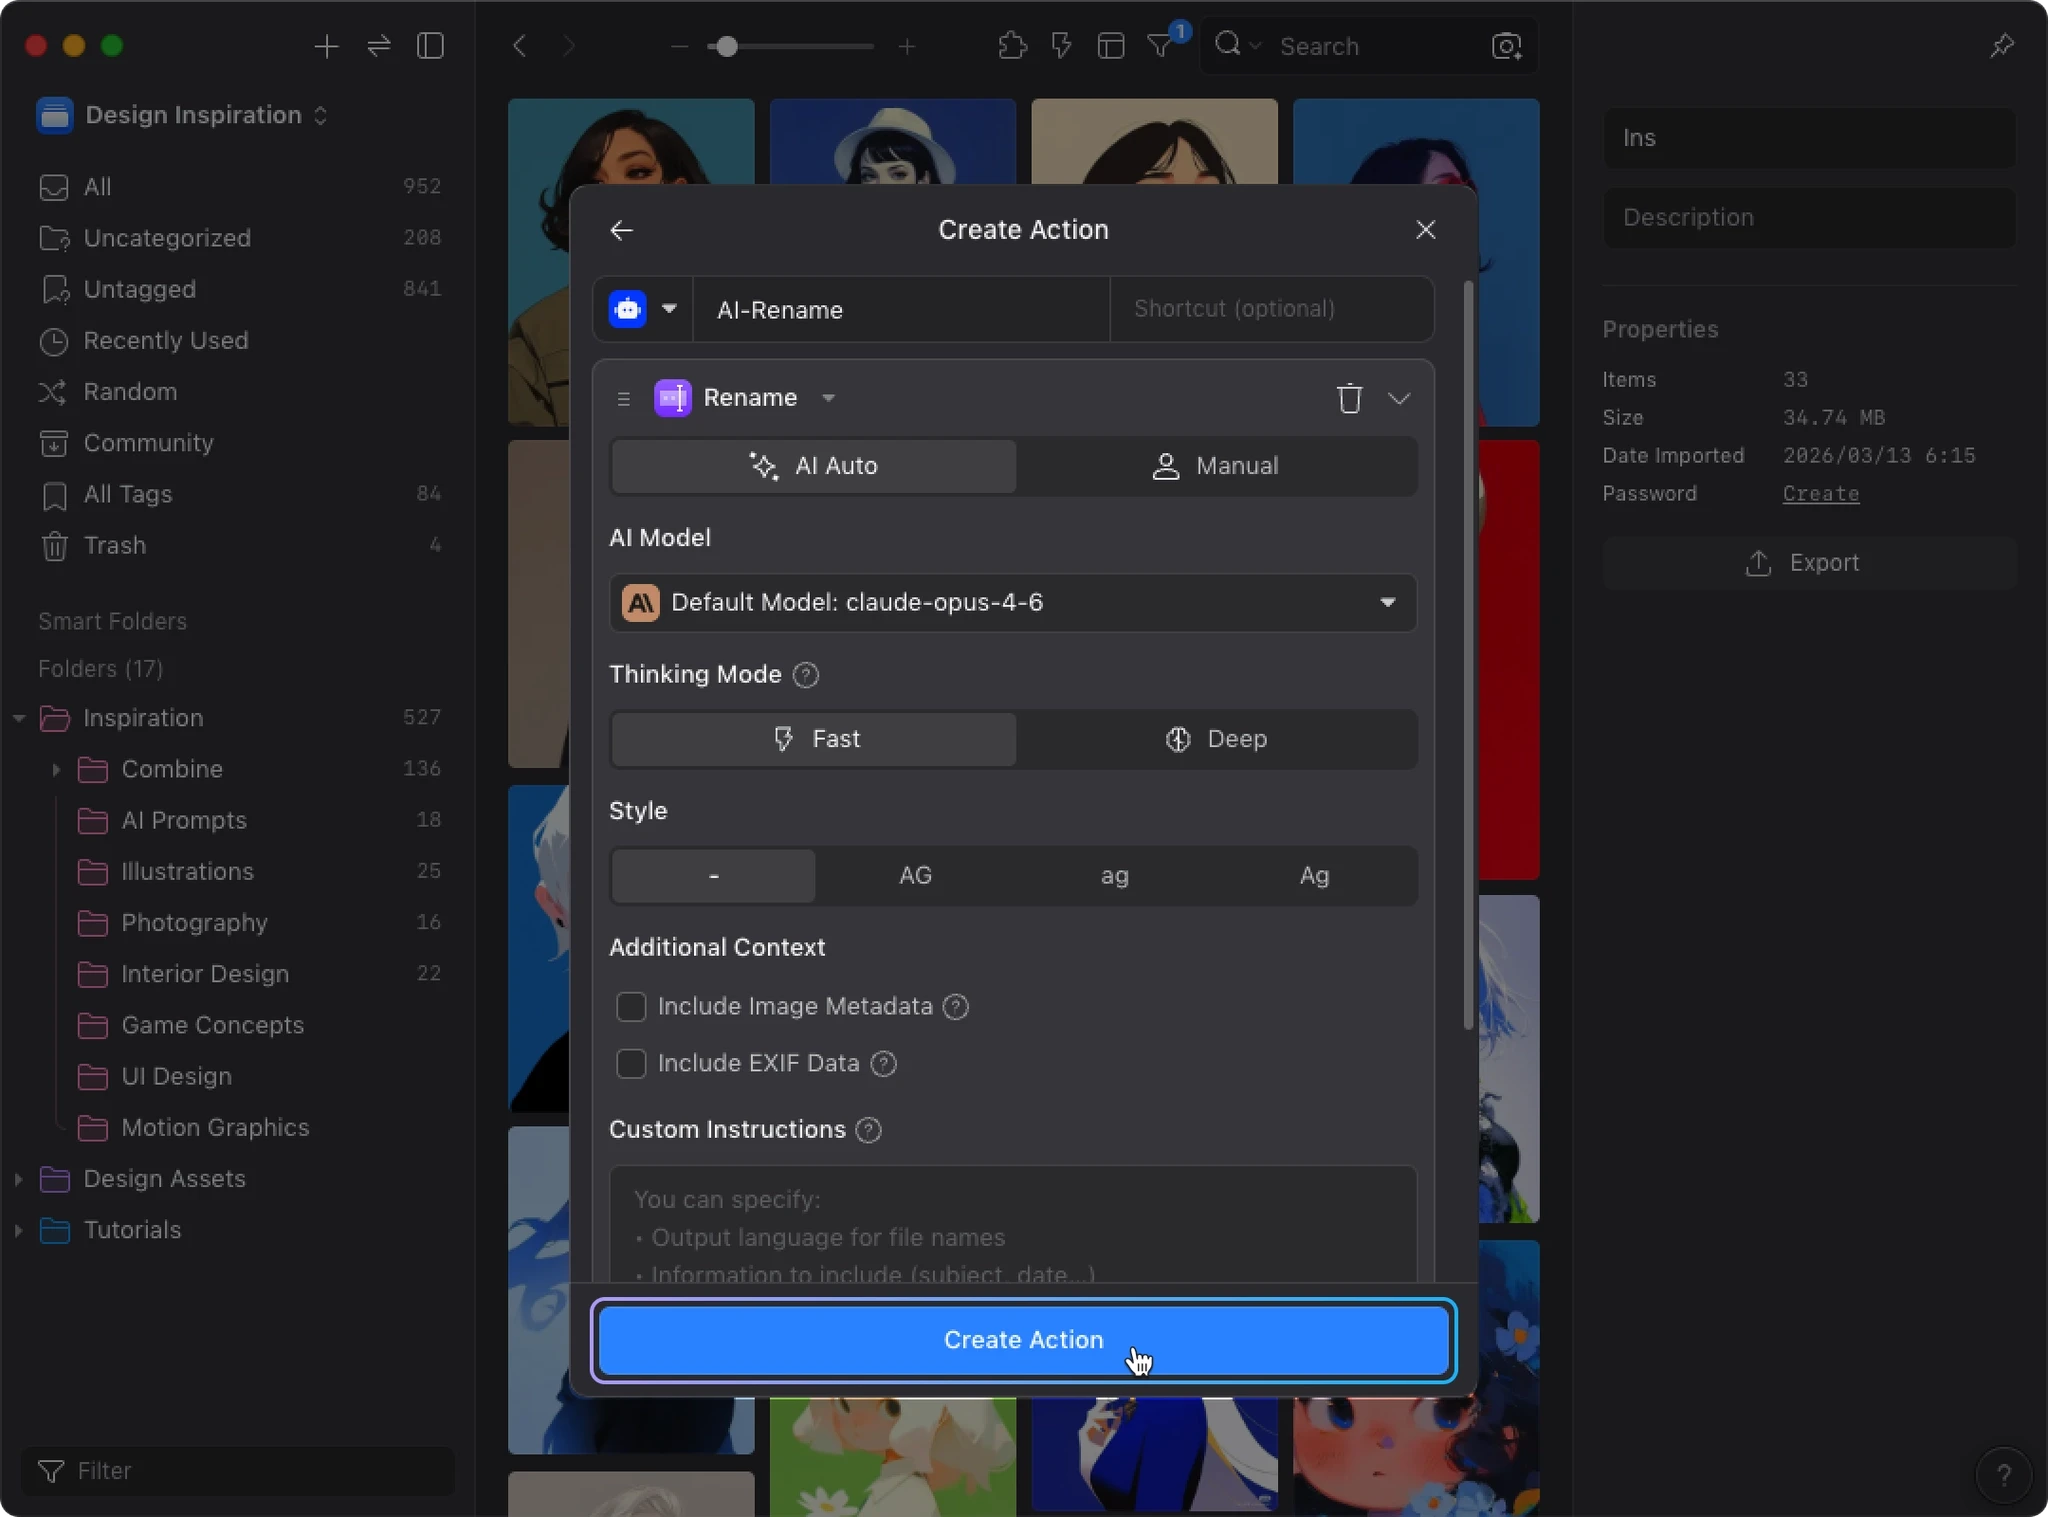
You’ll be taken back to the action list, where your new AI Rename action is now visible.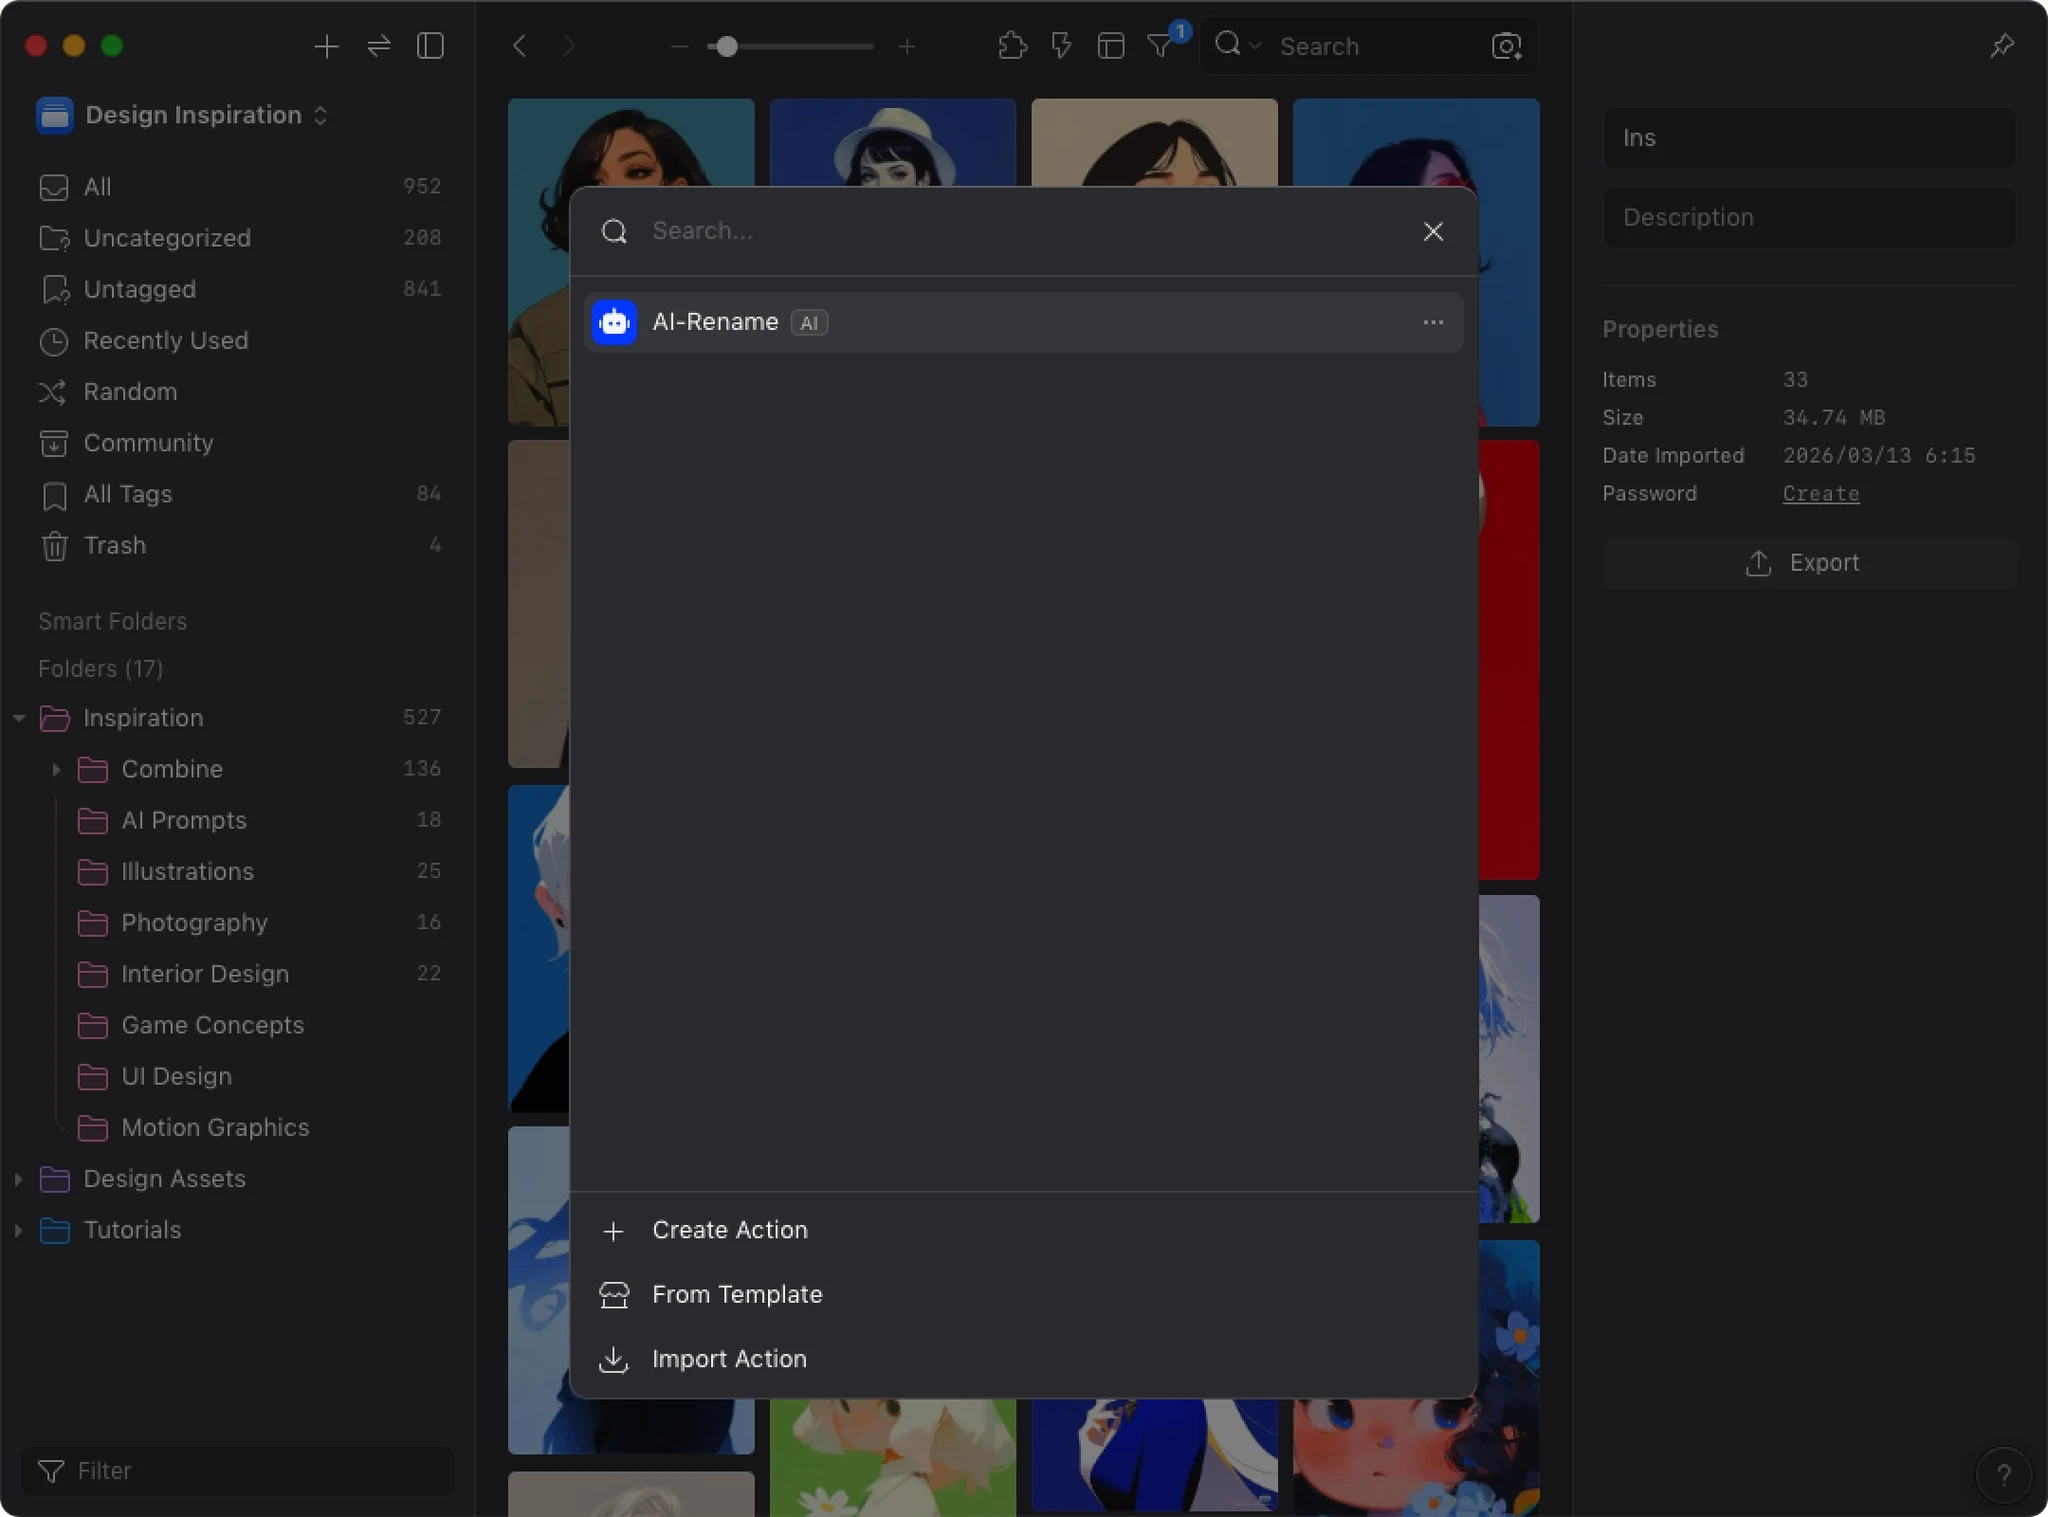
Test Your First Action
Now let’s try it with some real images.
Select Images and Run
- Close the AI Action window and return to Eagle’s file list
- Select 1–2 images you’d like to rename
- Right-click and open “Plugins”, or press the shortcut key
P - Click “AI Action”

- Click the “AI Rename” action you just created
Confirm and Execute
You’ll enter the “Execute Action” confirmation screen, which shows:
- Action name
- Number of selected files
- Operations that will be performed
You can also add extra instructions in the text box at the bottom (optional). Once everything looks good, click “Execute Action” to start.
View the Results
During execution, you can watch the progress of each file in real time. When everything is done, the screen shows “Completed” with:
- Original filename
- AI-generated new name
Click “Confirm” to close the window. Back in Eagle’s file list, you’ll see that the selected images have been renamed.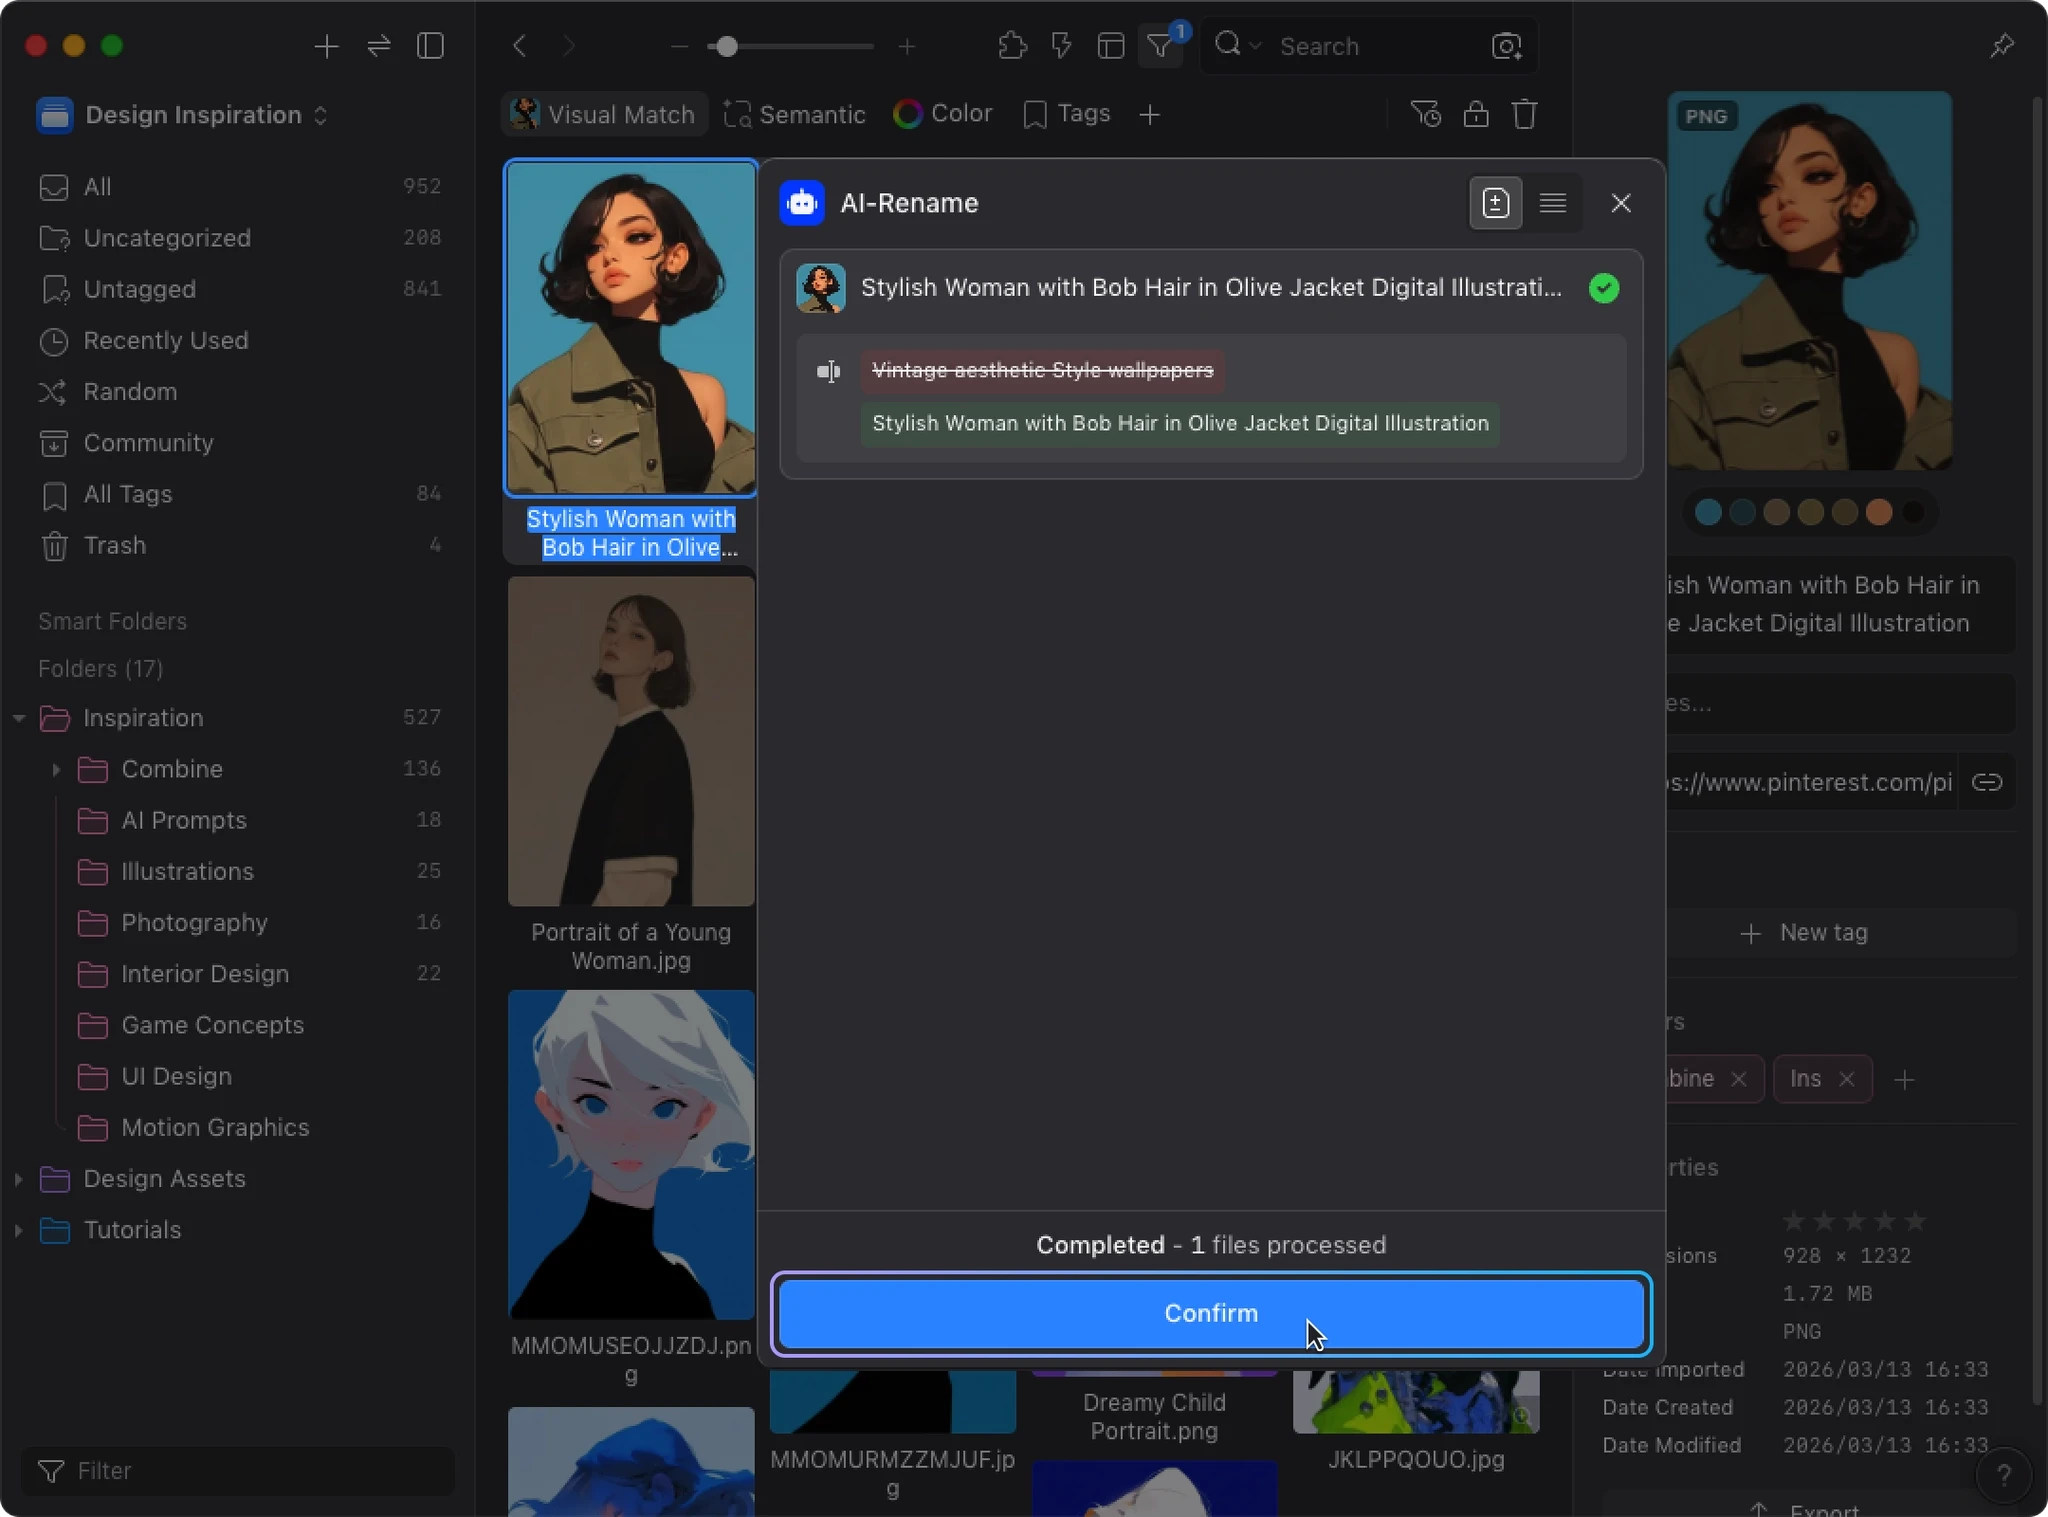
You’ve now created and run your first AI Action.
Customize Further: Add Custom Instructions
The default settings already produce good results, but Custom Instructions let you control exactly how AI generates its output. Over time, you can shape a workflow that fits your habits.
Edit an Action
- Open the AI Action plugin
- Find the action you just created
- Click the “...” button on the right side of the action
- Select “Edit” from the menu

Write Custom Instructions
In the edit screen, scroll to the “Custom Instructions” field and enter your requirements.
For example: Name in English, using the format "Subject - Style", keep it under 15 characters.
Then click “Save”.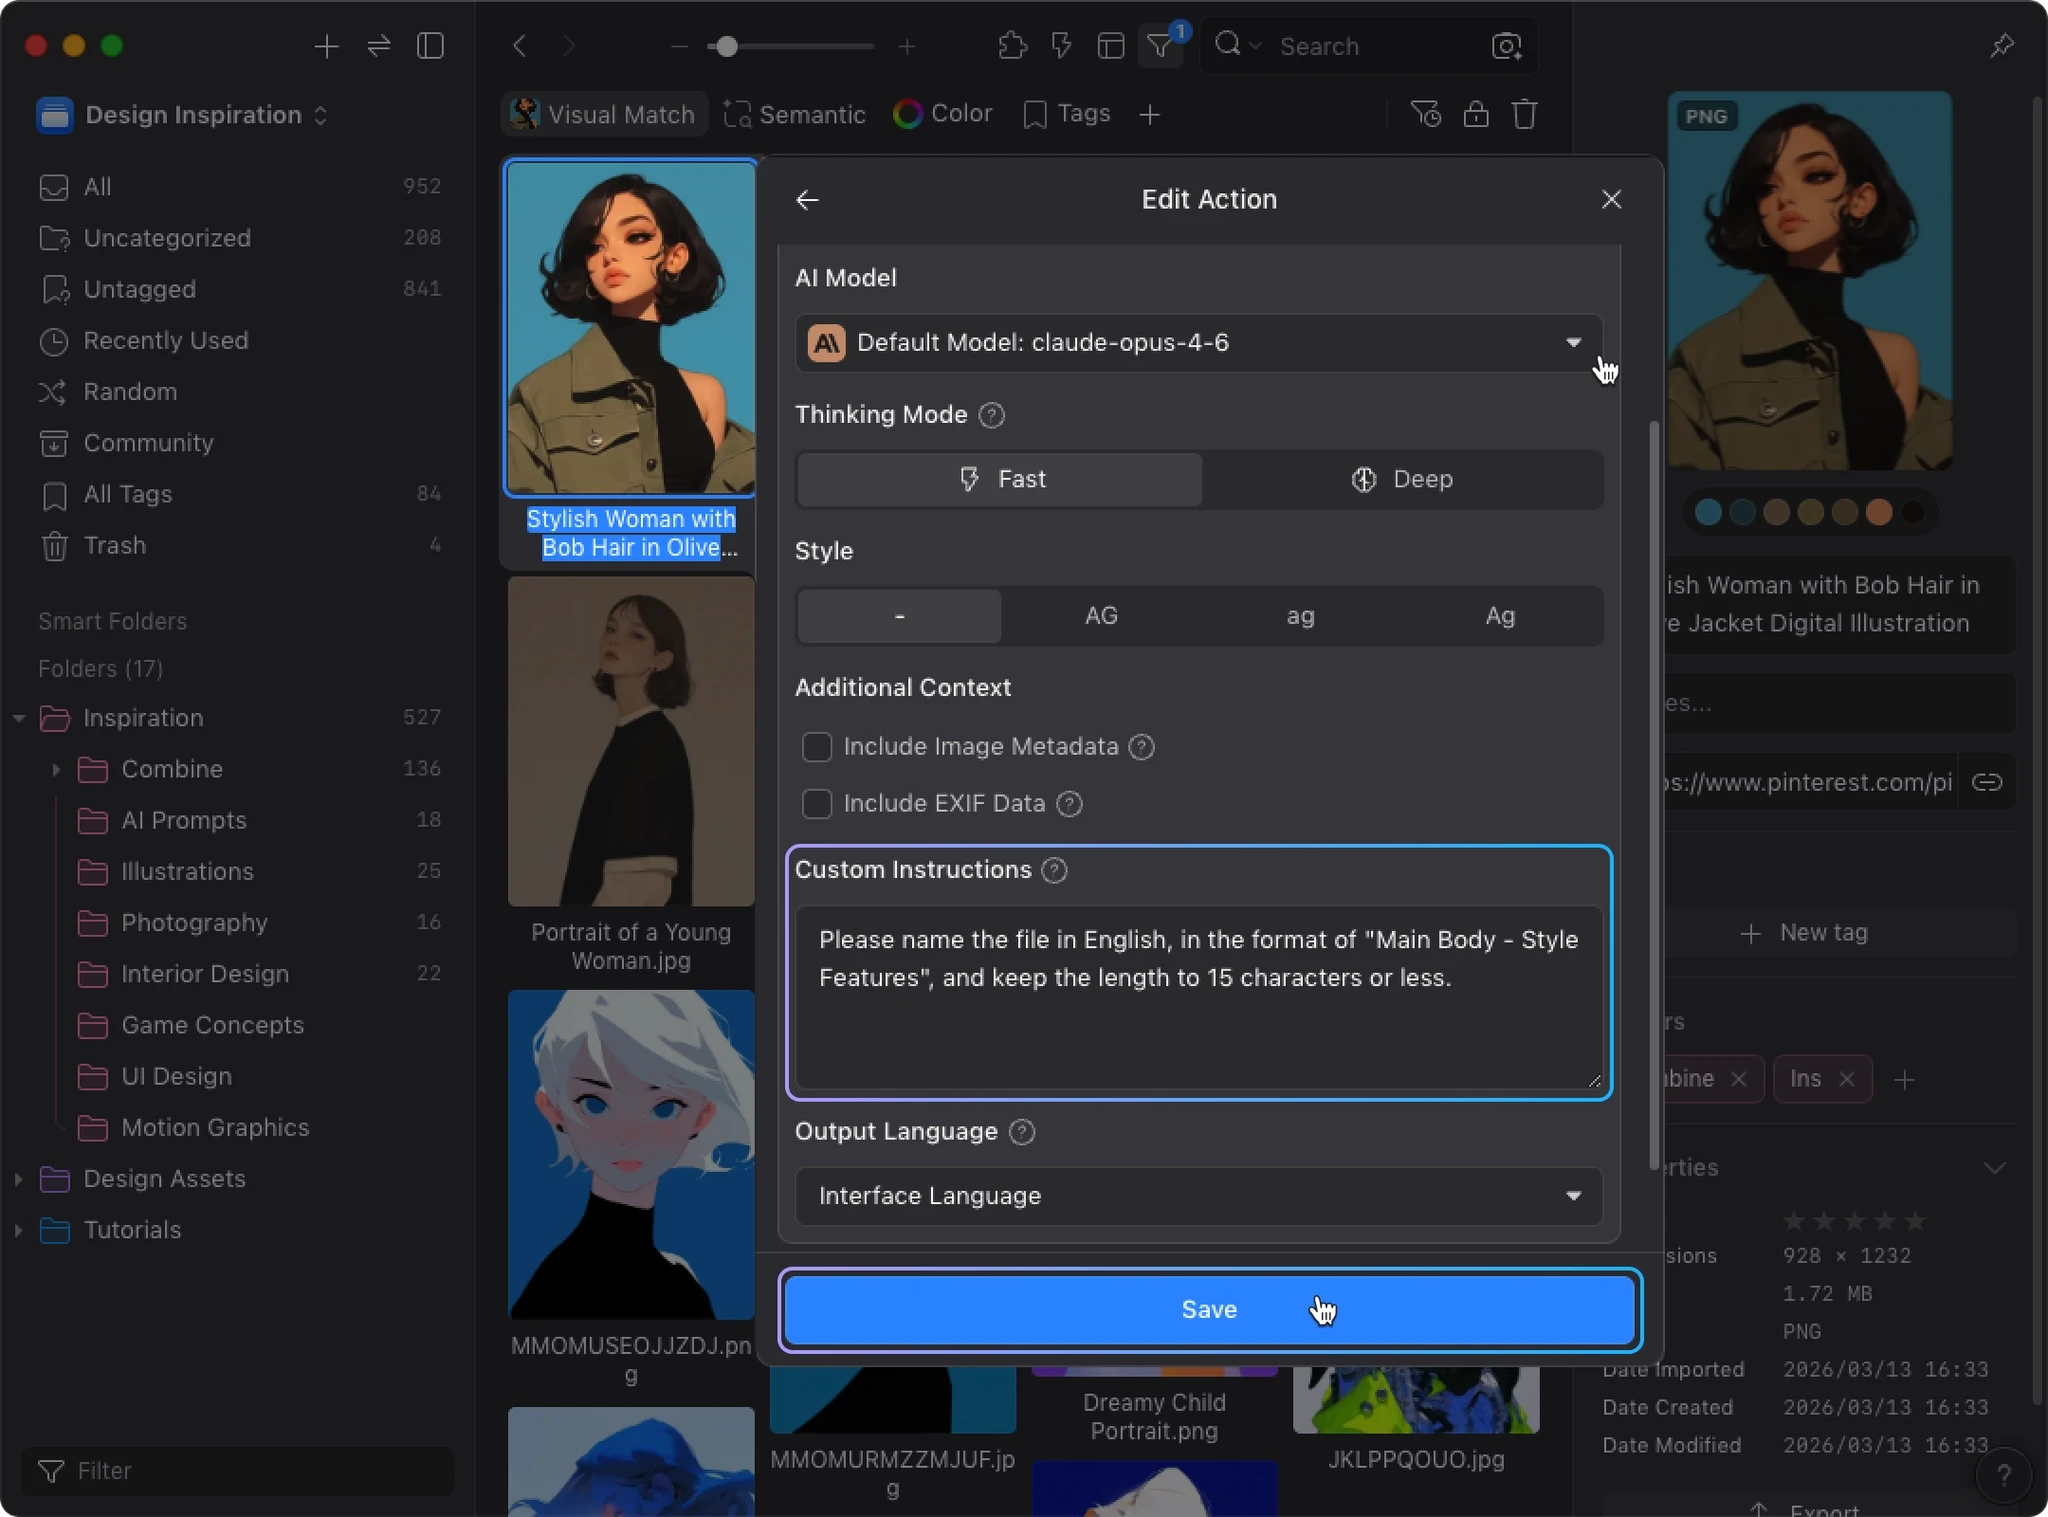
Re-run and Compare
Select the same images again, repeat the execution steps, and compare with the previous results. You’ll notice that AI now follows your specified format, language, and style more closely.
This is the core loop of AI Action: Create → Test → Tweak Instructions → Test Again. Through this cycle, you can gradually shape AI into an assistant that fits your workflow.
Quick Start with Templates
If you’d rather not start from scratch, templates can get you going faster.
- In the AI Action window, click “Create from Template”
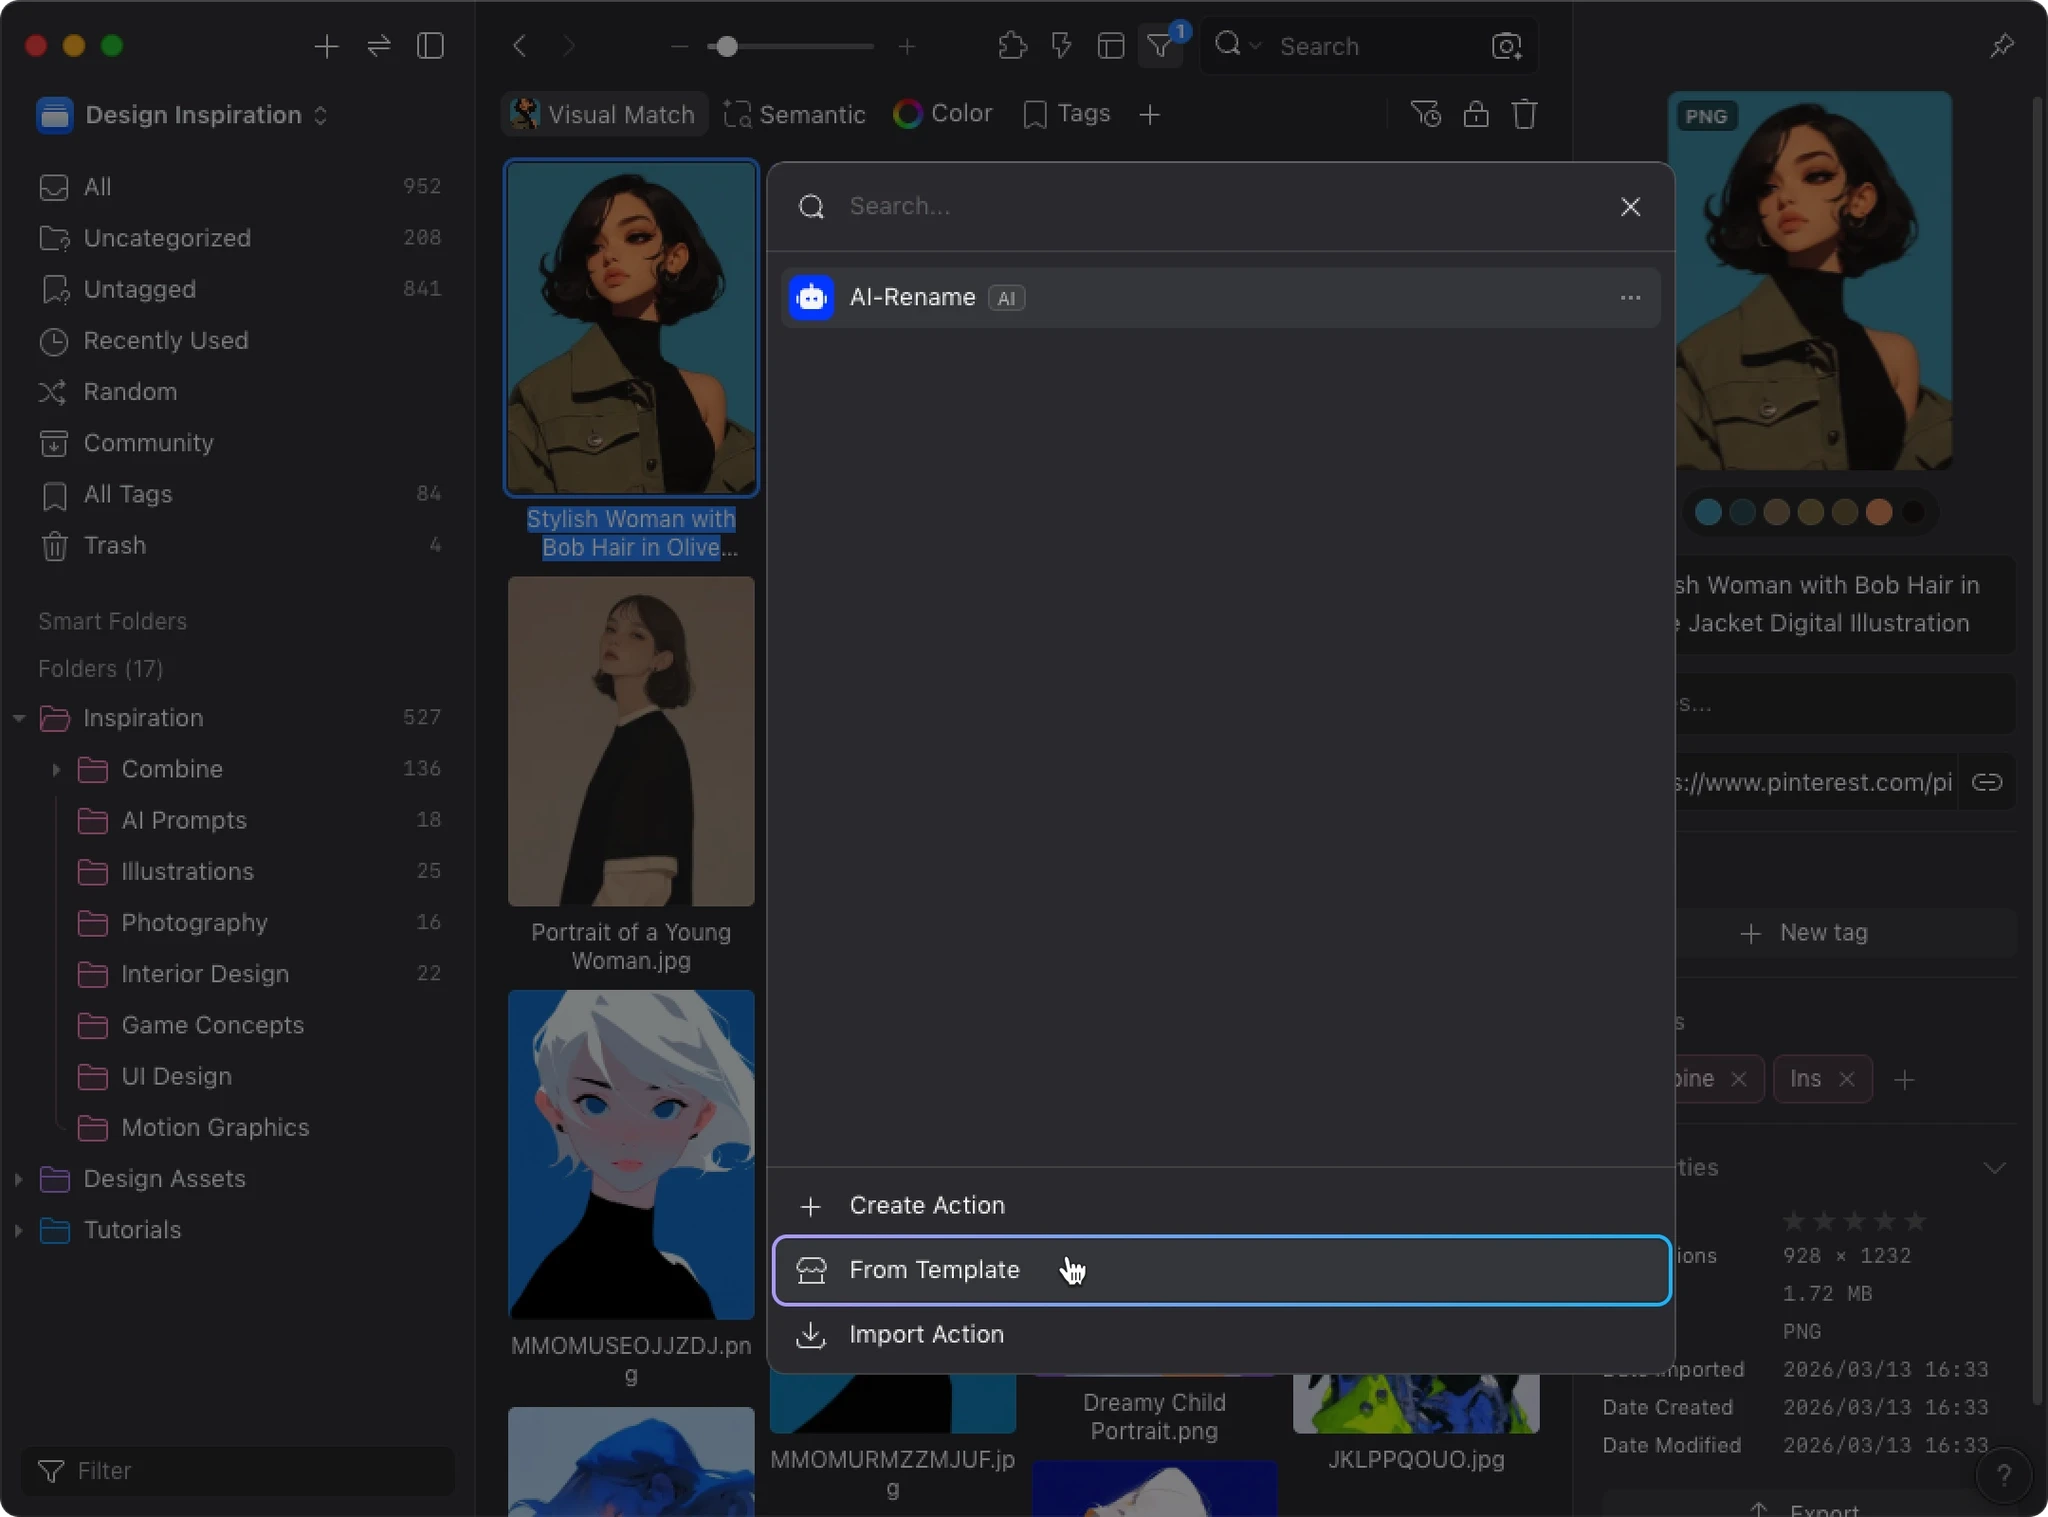
- Browse and select a template that fits your needs
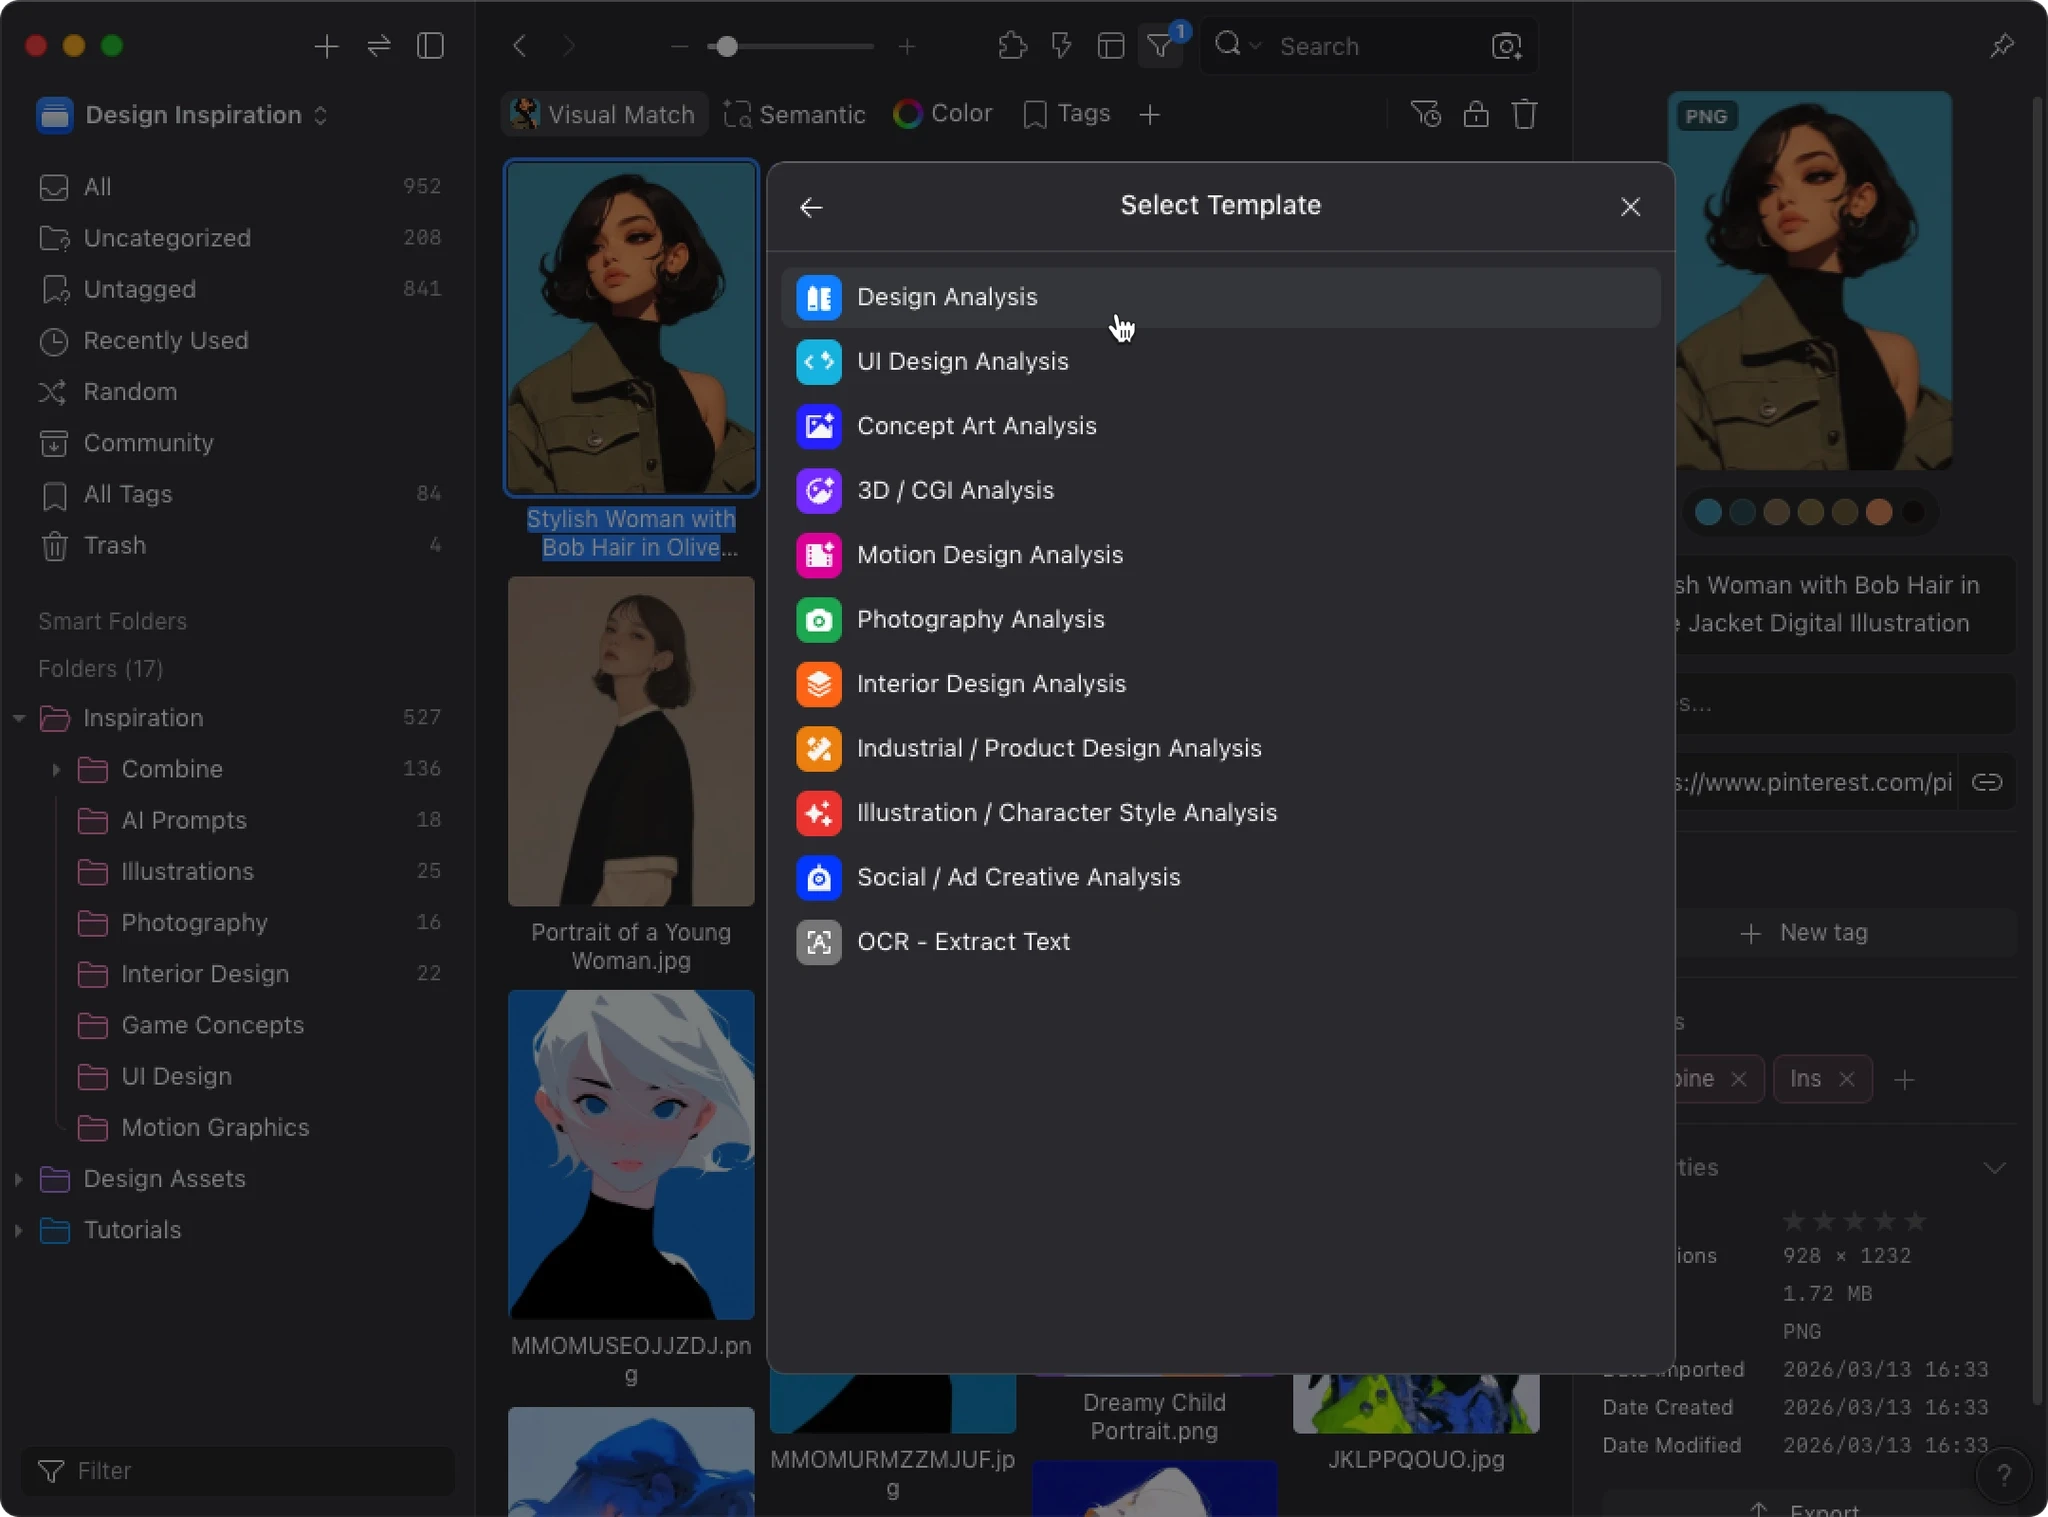
- Preview the template, then create it as-is or customize it first
Templates are a good starting point. After creating one, you can always fine-tune it through “Edit” to better match your workflow.
Tips for Beginners
Start with the Strongest Model
Start with a powerful model like Claude Opus 4.6. If results are still off with a strong model, the issue is likely in your prompts or settings, not the model itself. That makes it easier to pinpoint the problem.
Once you’re happy with the results, try switching to a more cost-effective model like Claude Sonnet 4.6 or Haiku 4.5 to see if they still meet your needs.
Test Small, Then Scale Up
Don’t start by running hundreds of images at once. Pick 3–5 representative images first, covering different types and complexity levels. This makes it easier to tell whether your setup works.
When adjusting, change only one variable at a time:
- Only change the prompt
- Only switch the model
- Only change the output format
This way you’ll know exactly which setting made the difference.
Make the Most of Custom Instructions
The more specific your instructions, the more consistent the results. Be explicit about:
- Language
- Naming format
- Length limits
- Analysis perspective
- Information to emphasize or preserve
For example:
- Output in English
- Use the format "Subject - Scene - Style"
- Keep it under 12 characters
- Describe the image from a UI design perspective
Prefer positive instructions. "Use English" tends to work more reliably than "Don’t use Chinese".
One practical tip: Think about how you’d search for an image later, then have AI name, describe, and tag it the same way.
For more prompting techniques, see the AI Action Best Practices Guide.
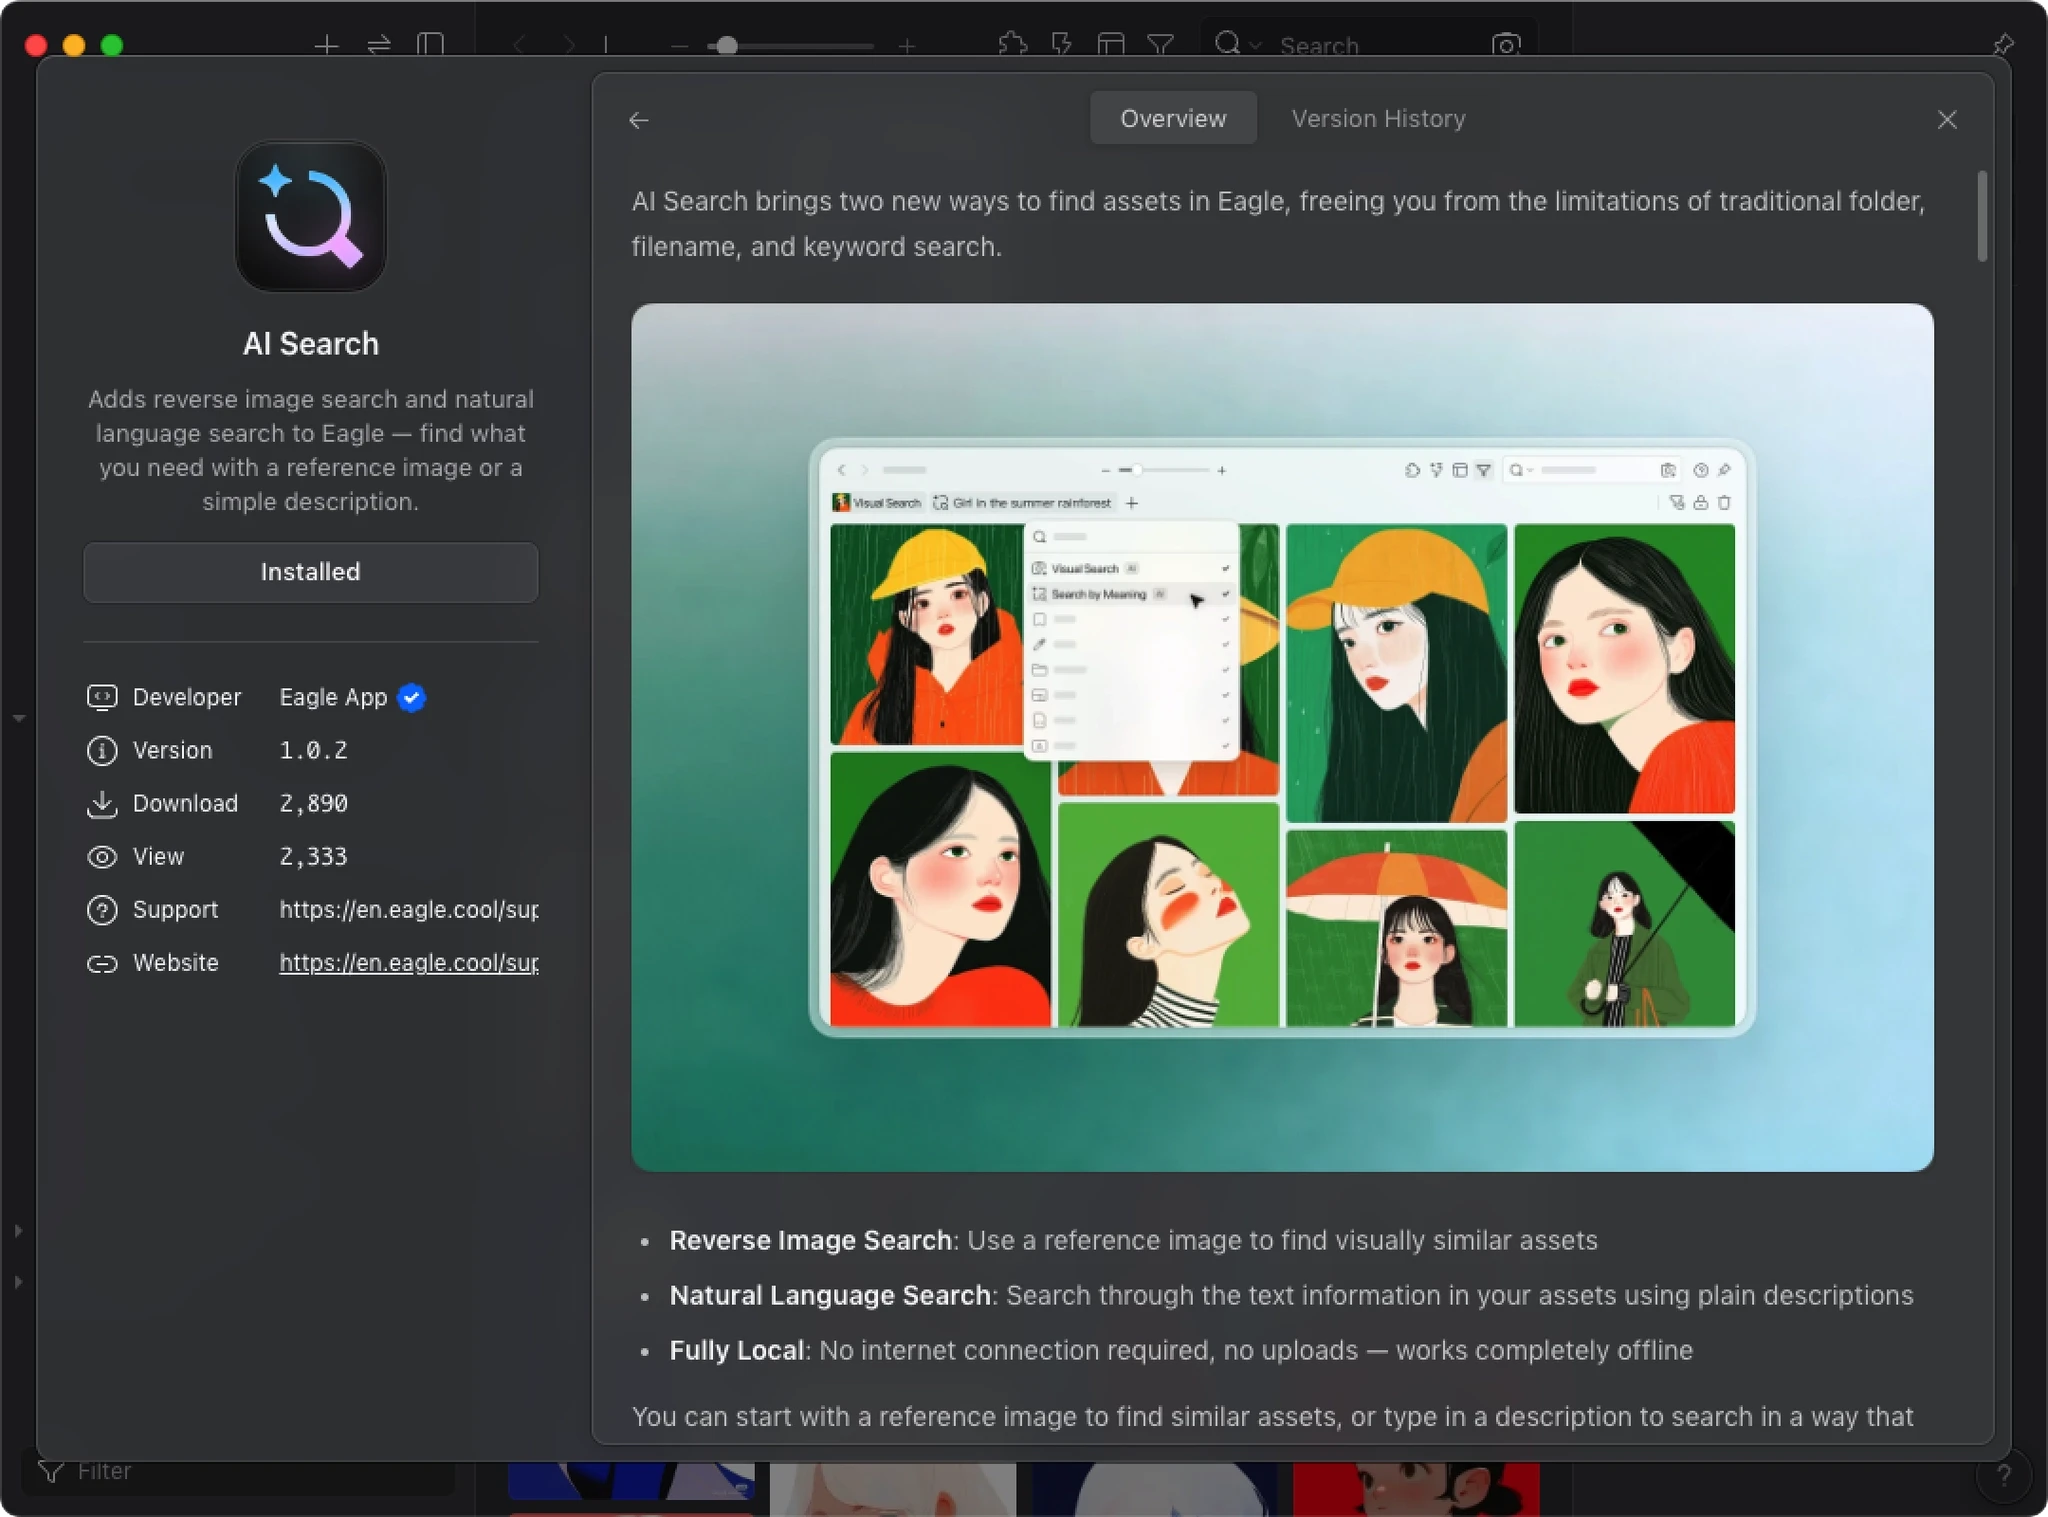
Recommended: Install AI Search for Better Tags and Sorting
If you plan to use AI Tags or AI Folders, we recommend installing AI Search first.
AI Search builds a visual similarity index for your library. When AI Action detects this data, it uses visual similarity and your existing organization to improve tagging and sorting accuracy. Instead of analyzing each image in isolation, AI can reference how you’ve already organized similar images.
How to Install
- Open “Plugins” → “Plugin Center”
- Search for “AI Search” and install
Next Steps
So far you’ve:
- Installed and configured the AI Models
- Installed the AI Action plugin
- Created your first AI Action
- Ran an image renaming workflow
- Customized AI output with Custom Instructions
- Learned how to use Templates and small-batch testing
AI Action can do more than renaming. It can write descriptions, sort into folders, tag images, rate quality, and more. By combining different steps and fine-tuning your instructions, you can build a workflow that matches how you actually organize images.
💡 Want to learn how to configure more effective actions? Check out the AI Action Best Practices Guide.
- [New] Revert all completed changes with one click when execution is paused — easily undo accidental Action triggers
- [New] Added OpenAI-compatible provider icon in the model selector
- [Improved] Significantly faster plugin launch — reopening is nearly instant after closing (requires Eagle 4.0 Build 23 or above)
- [Improved] Manual-only Actions triggered via shortcut now skip the confirmation page and execute directly
- [Fix] Fixed an issue where Google Gemini preview models (e.g. gemini-3-flash-preview) did not support certain model parameters, causing AI Tags and AI Folders features to fail
Initial release
You may also like